In today’s digital age, ensuring online privacy and security has become a top priority for individuals and businesses alike. With threats of data breaches and surveillance looming, it’s essential to adopt robust solutions that safeguard our digital footprint. In this guide, we’ll delve into setting up a Shadowsocks server on the HTTP Injector VPN, a powerful combination that offers unparalleled security and privacy for your browsing activities.
Table of Contents
- Introduction
- Configuring Your Shadowsocks Server for Seamless Online Security
- Step 1: Install HTTP Injector VPN
- Step 2: Configure Shadowsocks Settings
- Step 3: Choose the Appropriate Protocol and Host Settings
Introduction
In today’s digital landscape, where privacy and security are of paramount concern, the need for reliable and secure browsing solutions has never been more pressing. Fortunately, the combination of Shadowsocks and HTTP Injector offers a powerful and user-friendly approach to enhancing your online security and privacy. Join me as we embark on a step-by-step journey to set up a Shadowsocks server on the HTTP Injector VPN, unlocking a new level of secure browsing experience.
Configuring Your Shadowsocks Server for Seamless Online Security
In this section, we’ll walk through the process of setting up your Shadowsocks server on the HTTP Injector VPN to ensure seamless online security.
Create a Shadowsocks Server:
Before delving into the setup process, it’s imperative to have a Shadowsocks server ready for use. While the idea of setting up a server might sound daunting, numerous resources and tutorials simplify the process. Whether opting for a self-hosted solution or leveraging third-party services, ensuring a reliable and fast server is the cornerstone of a seamless VPN experience.
How to Create Shadowsokcs Server
Step 1: Install HTTP Injector VPN
The first step in our journey is to download and install the HTTP Injector VPN on your mobile device. Head to your device’s app store, whether it’s the Google Play Store or the iOS App Store, and search for “HTTP Injector VPN.” Once you’ve located the app, proceed with the installation process. With the HTTP Injector VPN now installed, you’re ready to move on to the next step.
Step 2: Configure Shadowsocks Settings
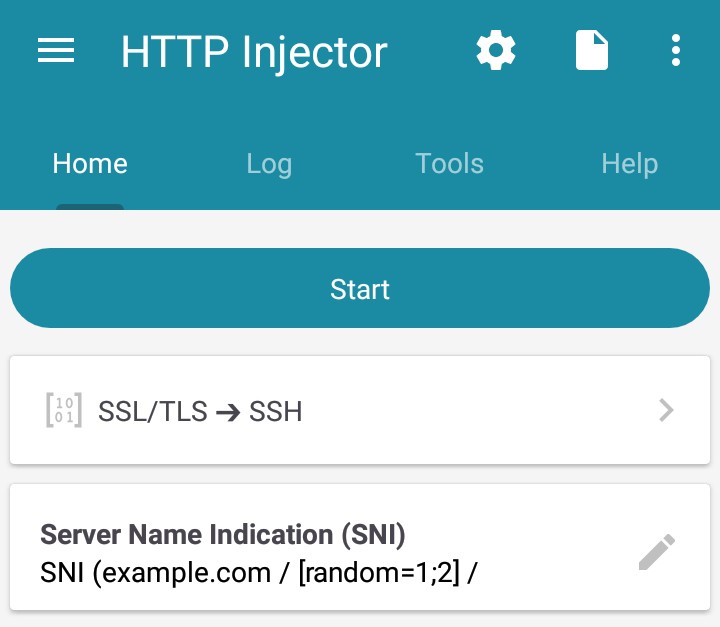
After launching the HTTP Injector VPN, you’ll find yourself on the home screen.
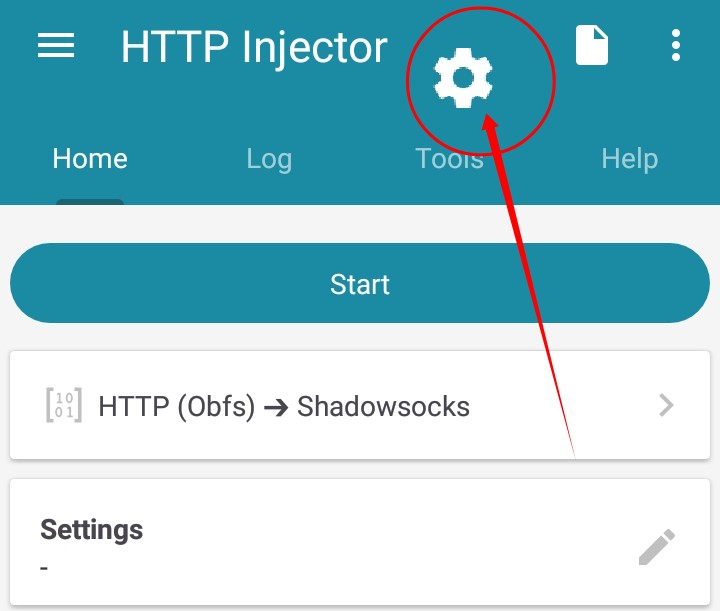
To begin configuring your Shadowsocks settings, tap on the gear icon located at the top center of the screen. This will take you to the app’s settings menu.
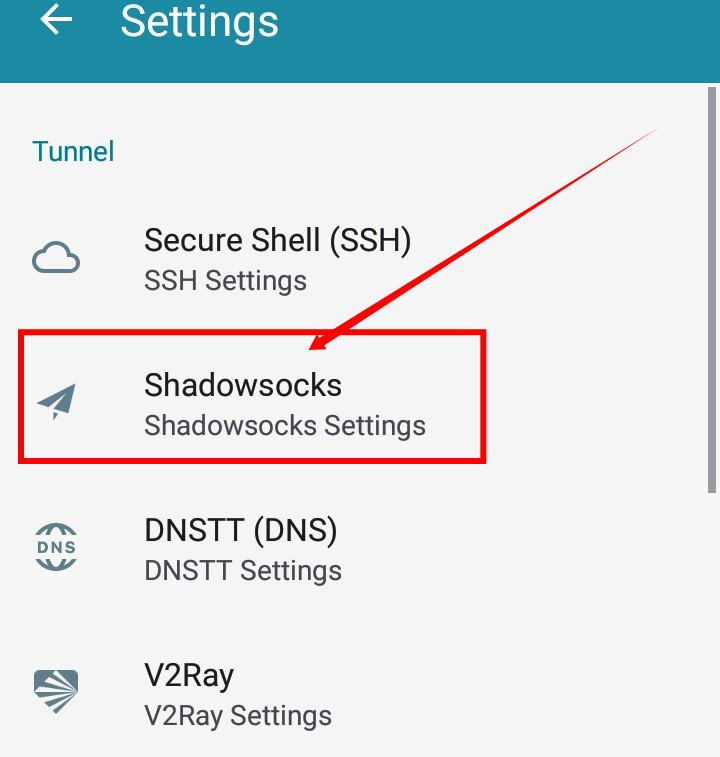
Now on next step Navigate to the “Shadowsocks” label and click on it .After this You will be on shadowsocks settings.
Now you will the small clipboard icon to paste either the HTTP obfuscation server or the TLS obfuscation server information.
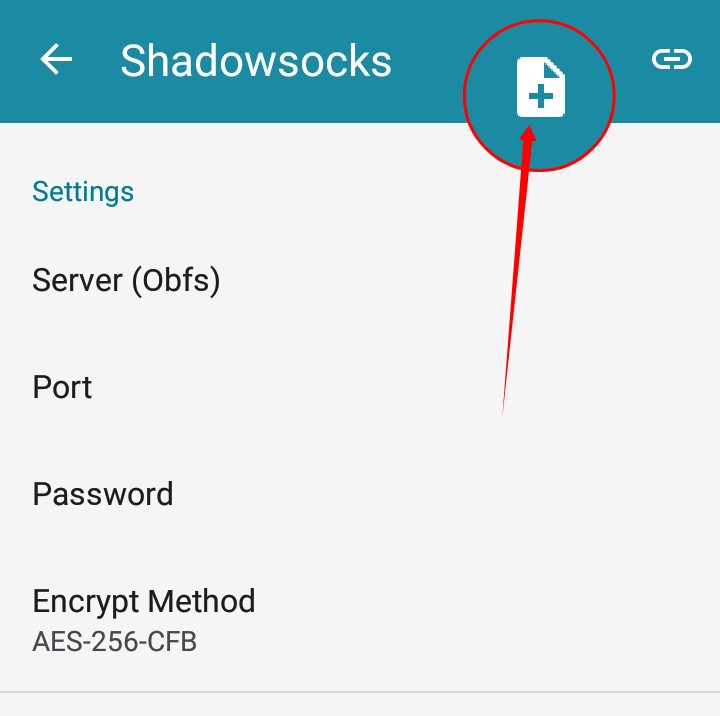
Once you’ve entered the necessary details, don’t forget to click the arrow to go back and save your changes.

Step 3: Choose the Appropriate Protocol and Host Settings
Now, it’s time to select the protocol and host settings that best suit your needs.
Depending on your preferences, you can choose between HTTP obfuscation and TLS obfuscation.
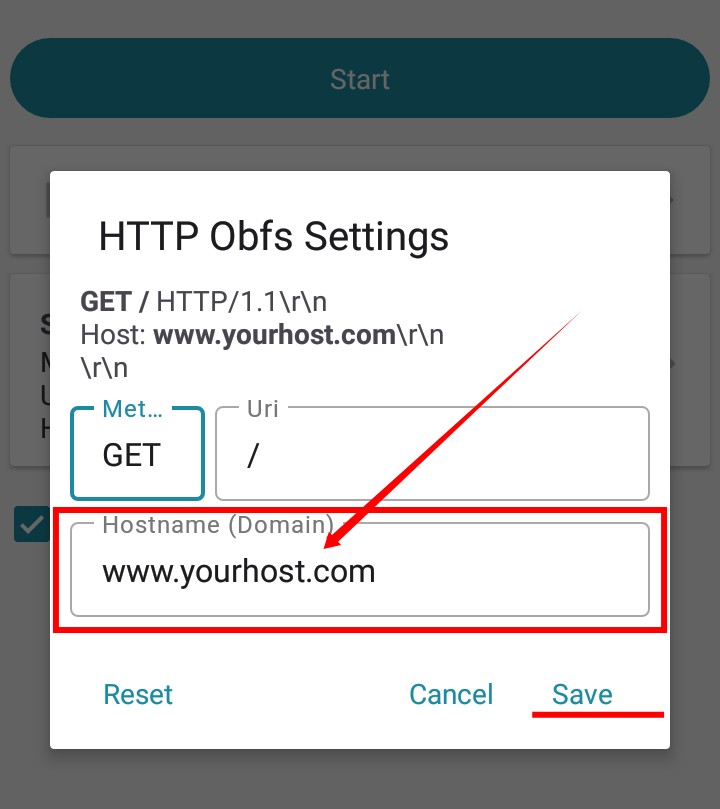
HTTP Obfuscation
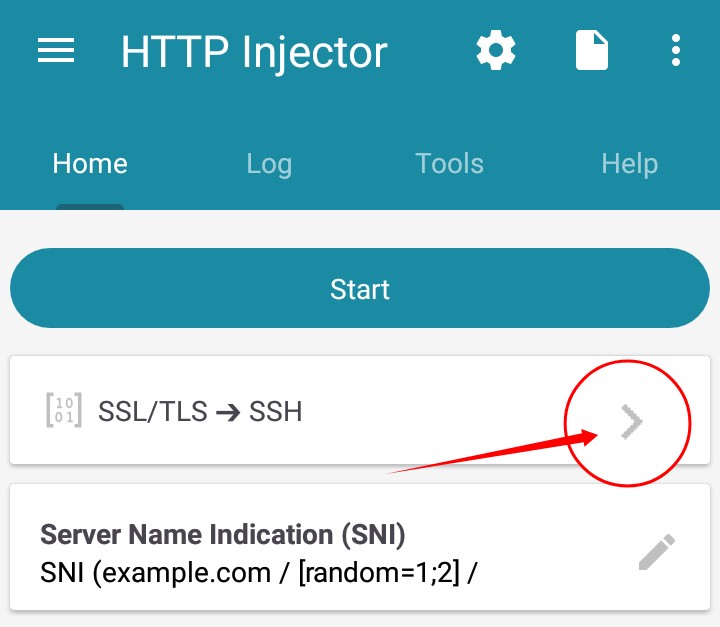
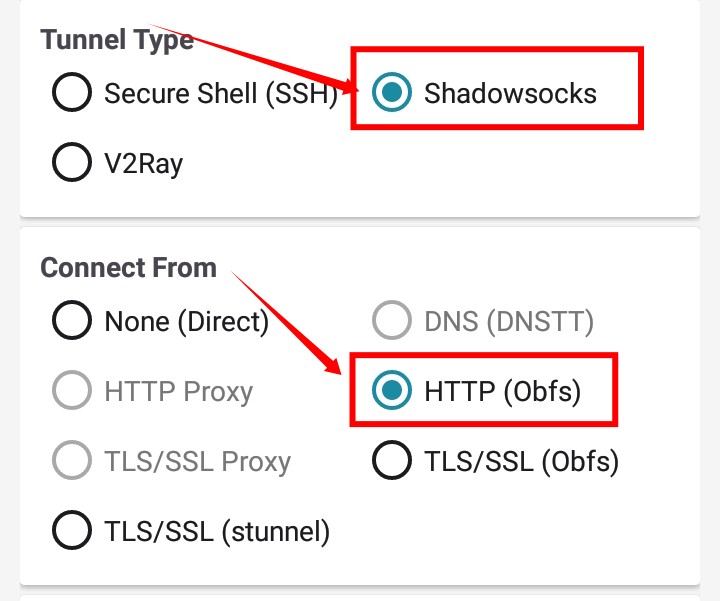
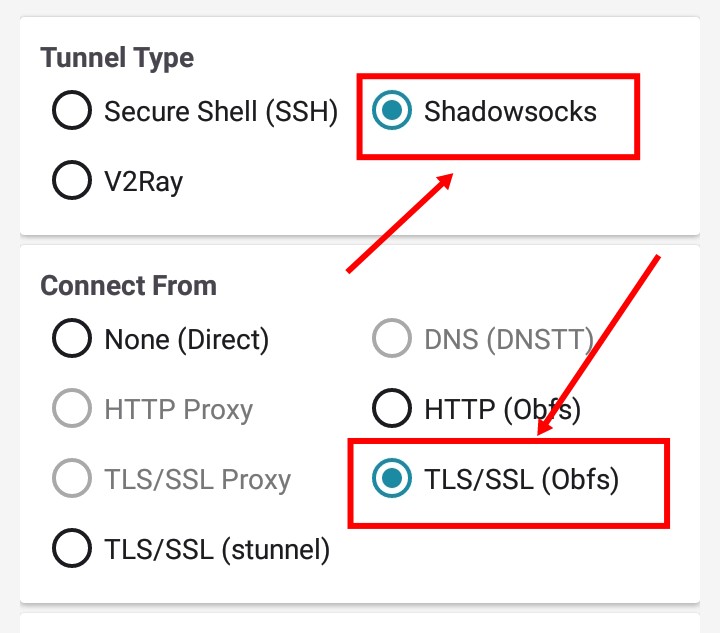
If you opt for HTTP obfuscation, click on the arrowhead icon on the right side of the screen. In the “Tunnel Type” dropdown, select “Shadowsocks,” and in the “Connection Type” dropdown, choose “HTTP obfs.” Once you’ve made your selections, click the “Save” button.
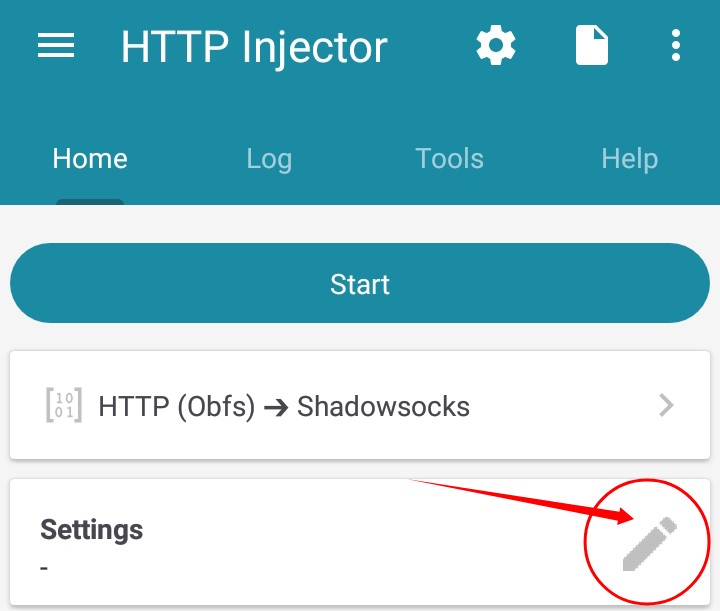
Next, click on the pencil icon to edit the host settings. Input a valid host in the provided field and save your changes.
TLS Obfuscation
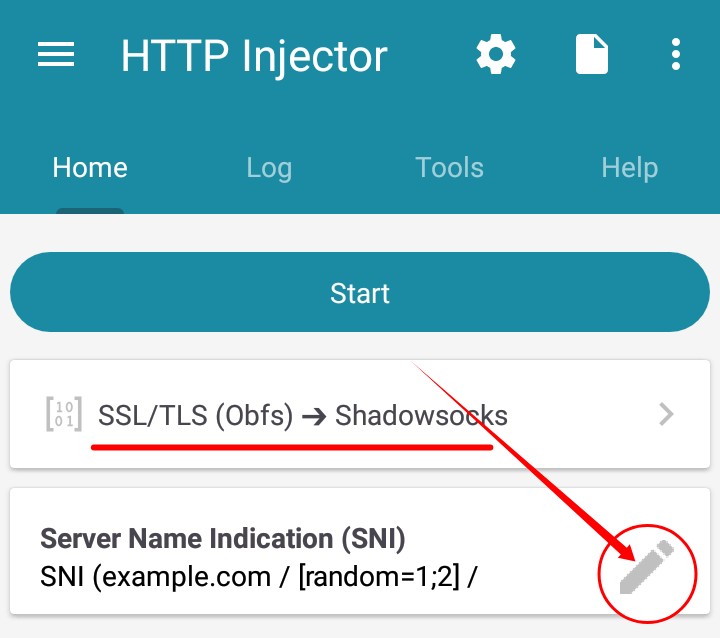
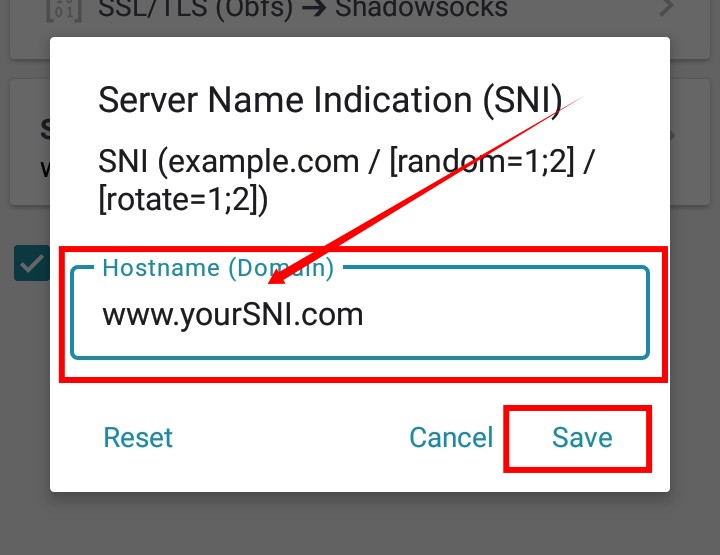
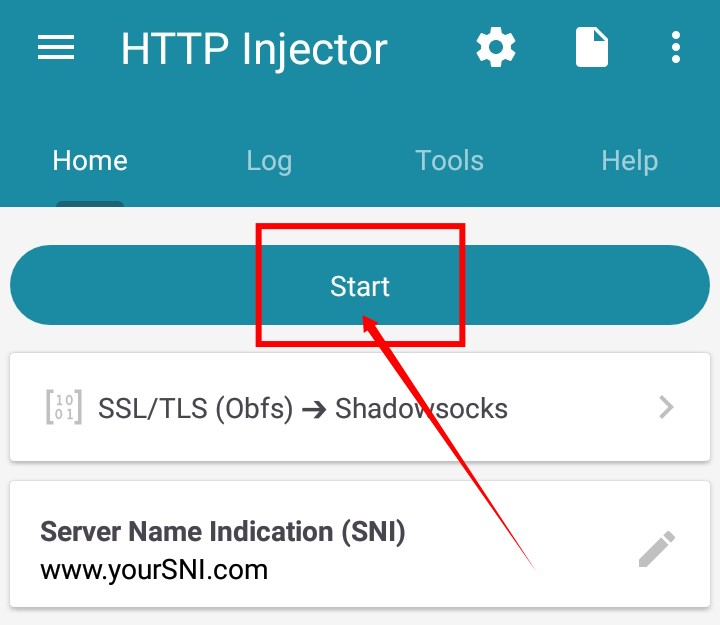
If you prefer TLS obfuscation, select “TLS obfs” from the settings menu.
Once you’ve made this selection, go back and input a valid SNI (Server Name Indication) in the given field.
Step 4: Connect to the VPN
Regardless of the method you’ve chosen, whether it’s HTTP obfuscation or TLS obfuscation, the final step is to click the “Start” button to connect to the VPN. Congratulations! You’ve now successfully set up a Shadowsocks server on the HTTP Injector VPN, and you can enjoy a secure browsing experience with enhanced privacy and protection.
Conclusion
In today’s digital landscape, where privacy and security are of paramount concern, the combination of Shadowsocks and HTTP Injector offers a powerful and user-friendly solution to enhance your online security and privacy. By following the steps outlined in this guide, you’ve unlocked the power of secure browsing, empowering you to navigate the web with confidence and peace of mind.
Remember, the world of technology is constantly evolving, and staying informed is crucial. Be sure to subscribe to our channel and follow my blog for more informative tech guides and insights. Together, let’s explore the ever-expanding realm of digital security and unlock the full potential of a secure online experience.
