In today’s tutorial we will learn how to setup HTTP Custom OpenVPN Server but first let understand what is VPN? A virtual private network (VPN) is a mechanism for creating a secure connection between a computing device and a computer network, or between two networks, using an insecure communication medium such as the public Internet. In today’s digital landscape, where online privacy and security have become paramount, the need for reliable virtual private network (VPN) solutions has never been more pressing. One such versatile VPN app that has gained significant attention is HTTP Custom, which offers a range of cutting-edge protocols, including the renowned OpenVPN. In this comprehensive guide, we’ll delve deep into the process of setting up an HTTP Custom OpenVPN server, empowering you to take control of your digital footprint and safeguard your sensitive information.
Table of Contents
- Introduction to HTTP Custom OpenVPN
- The Advantages of HTTP Custom OpenVPN
- Step-by-Step Guide: Setting Up an HTTP Custom OpenVPN Server
- Download and Install the HTTP Custom VPN App
- Launch the HTTP Custom VPN App
- Obtain an OpenVPN Configuration File
- Create an OpenVPN Server on SSHMAX
- Create an SSHMAX Account
- Download the OpenVPN Configuration File
- Import the OpenVPN Config File into HTTP Custom VPN
- Connect to the OpenVPN Server
- Explore Additional Customization Options (Optional)
4.Conclusion: Embrace the Power of HTTP Custom OpenVPN
Introduction to HTTP Custom OpenVPN
In the ever-evolving digital landscape, protecting your online privacy and security has become paramount. One powerful solution that has emerged is the HTTP Custom VPN, an all-in-one VPN app that boasts a range of cutting-edge protocols, including the renowned OpenVPN. In this comprehensive article, we’ll guide you through the process of setting up an HTTP Custom OpenVPN server, empowering you to take control of your digital footprint and safeguard your sensitive information.
The Advantages of HTTP Custom OpenVPN
The HTTP Custom VPN app stands out as a versatile and reliable choice for those seeking to harness the power of OpenVPN. By leveraging the robust encryption and security features of OpenVPN, HTTP Custom allows you to shield your online activities from prying eyes, ensuring your data remains safe and secure. This makes it an ideal solution for individuals, small businesses, and enterprises alike, who value their digital privacy and security.
Step-by-Step Guide: Setting Up an HTTP Custom OpenVPN Server
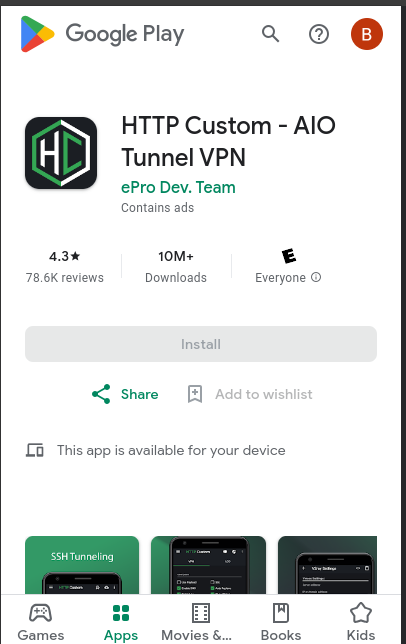
Download and Install the HTTP Custom VPN App
- Open the Google Play Store on your Android device and search for “HTTP Custom VPN.”
- Tap on the top search result to navigate to the app’s listing, and then click the “Install” button to download and install the app.
Launch the HTTP Custom VPN App
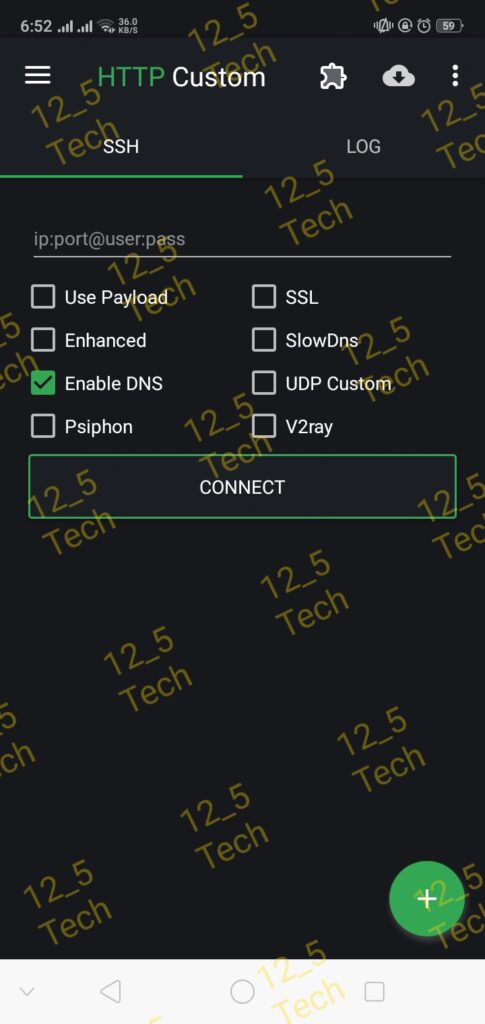
- After the installation is complete, go back to your home screen and launch the HTTP Custom VPN app.
- You’ll be presented with the app’s home screen, where you can explore the various VPN protocols supported, including the powerful OpenVPN.
Obtain an OpenVPN Configuration File
- To set up the OpenVPN server, you’ll need an OpenVPN configuration file.
- Open your web browser and navigate to the SSHMAX website by searching for “SSHMAX” and clicking on the first result.

Create an OpenVPN Server on SSHMAX
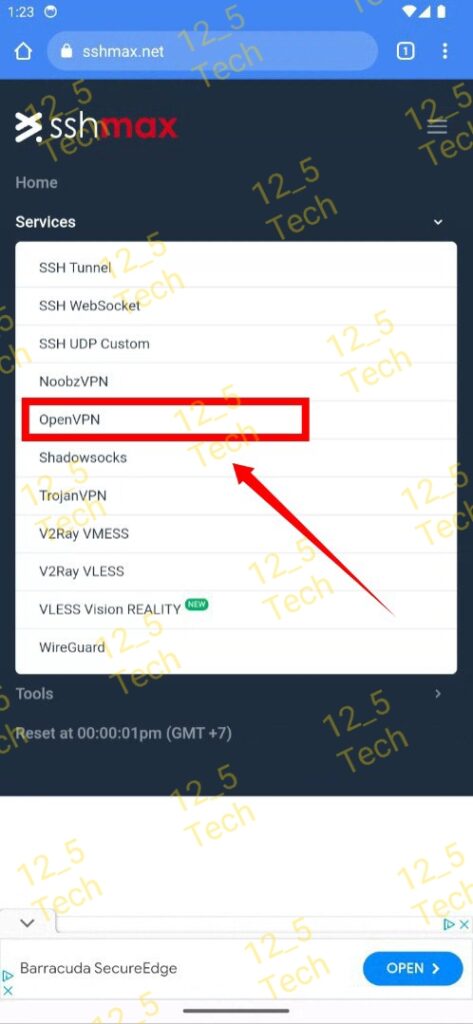
- On the SSHMAX website, tap on the hamburger icon (three lines) in the top-right corner of the screen.

- From the menu that appears, select the “Service” option, and then click on “OpenVPN.”

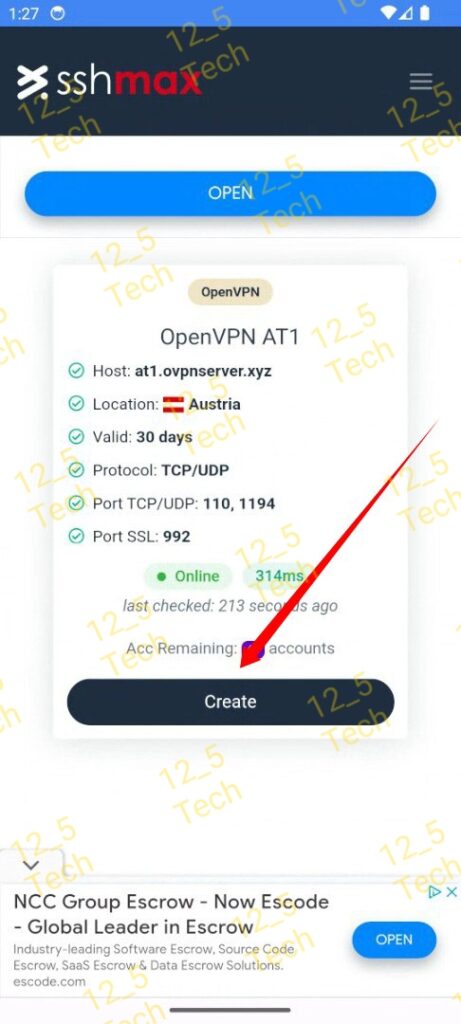
- Scroll down the page and choose the server location that you’d like to use for your OpenVPN server.
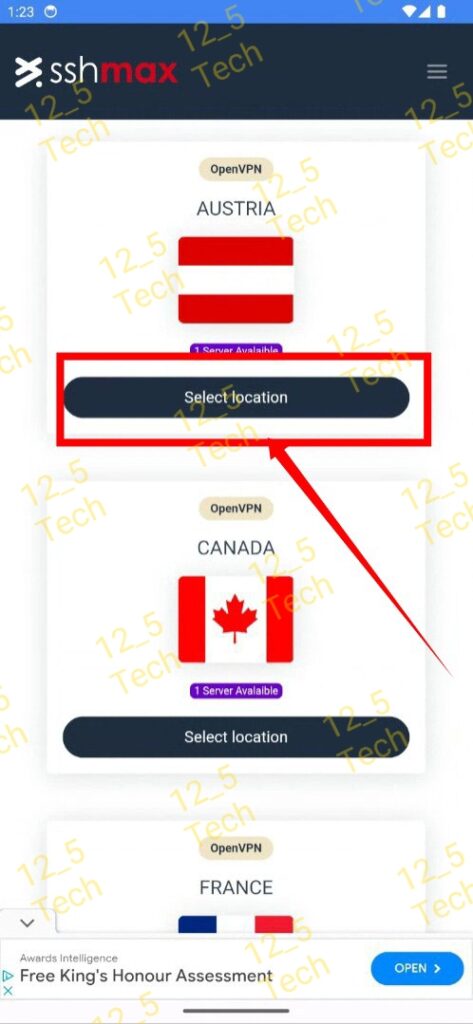
- Once you’ve made your selection, click on the “Select Location” button, and then click on “Create” to proceed.
Create an SSHMAX Account
- You’ll now be presented with an account creation form.
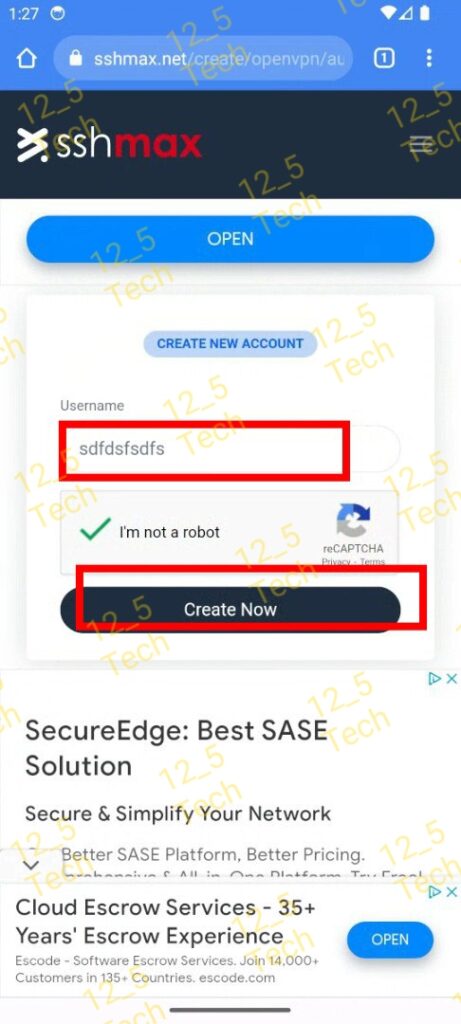
- Enter a username of your choice and check the reCAPTCHA box to verify that you’re not a bot.
- Click on the “Create Account” button, and your account will be created instantly.
Download the OpenVPN Configuration File
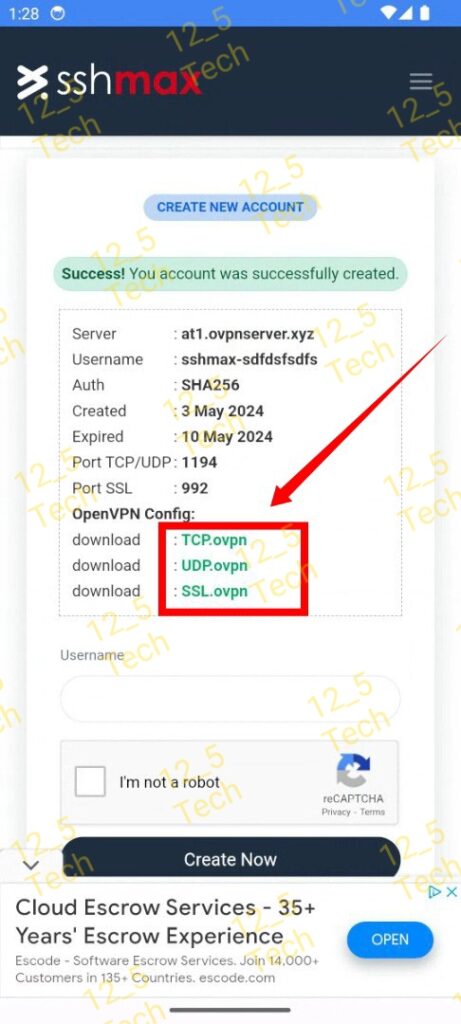
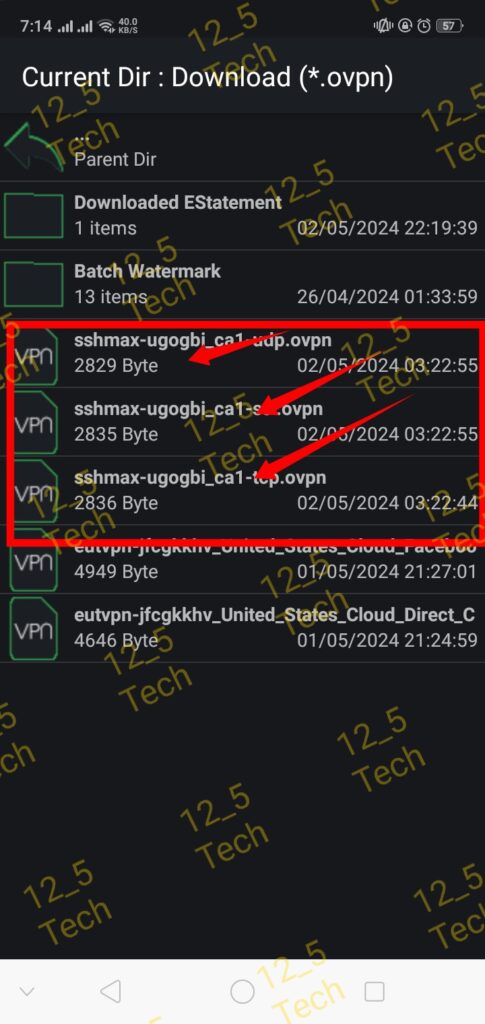
- After your account is created, you’ll see links to download the OpenVPN configuration files (TCP, SSL, or UDP).
- Choose the file type you prefer and click on the corresponding download link. The file will be saved to your device’s download folder.
Import the OpenVPN Config File into HTTP Custom VPN
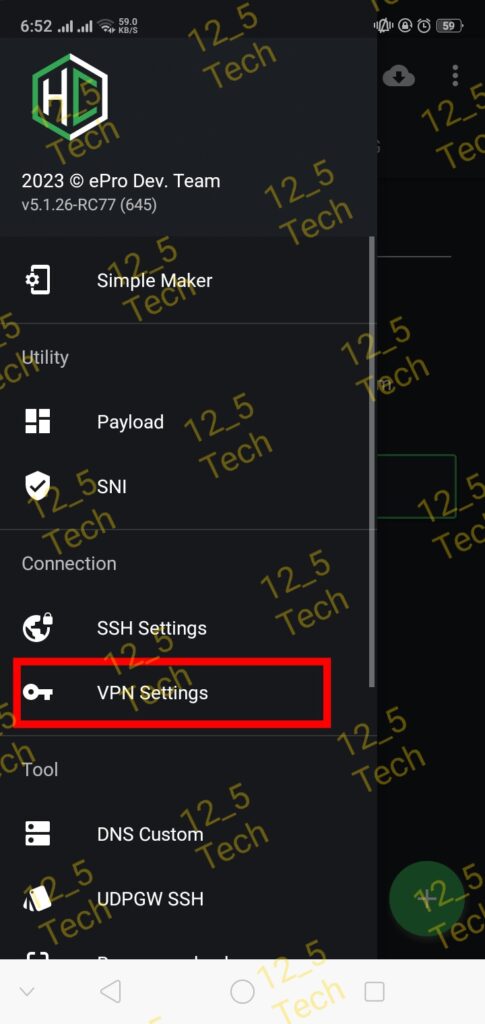
- Go back to the HTTP Custom VPN app and tap on the hamburger icon in the top-left corner.
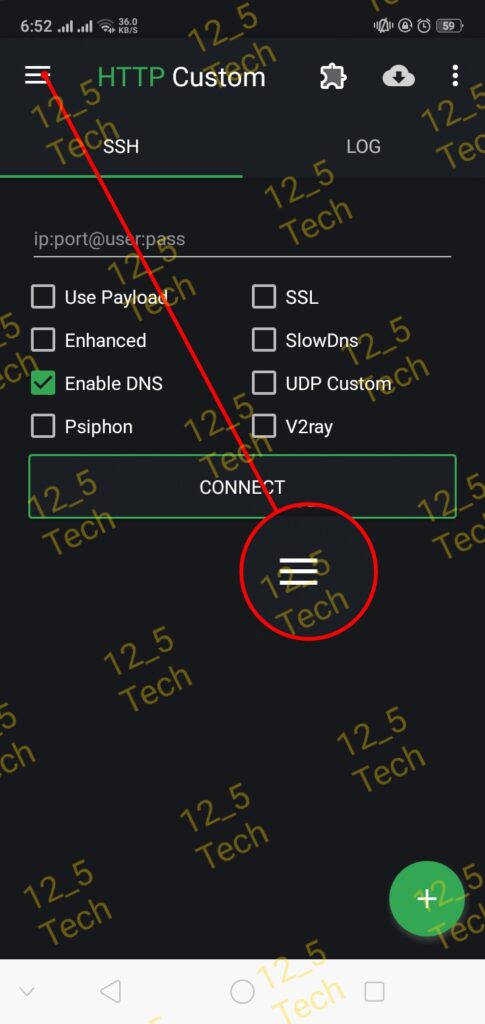
- From the menu that appears, select the “VPN Settings” option.
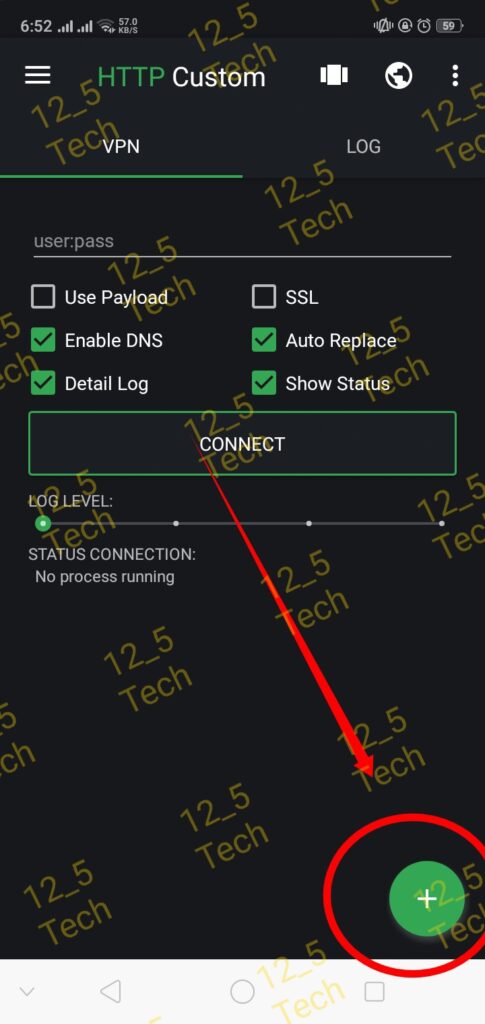
- Tap on the “+” icon in the bottom-right corner.
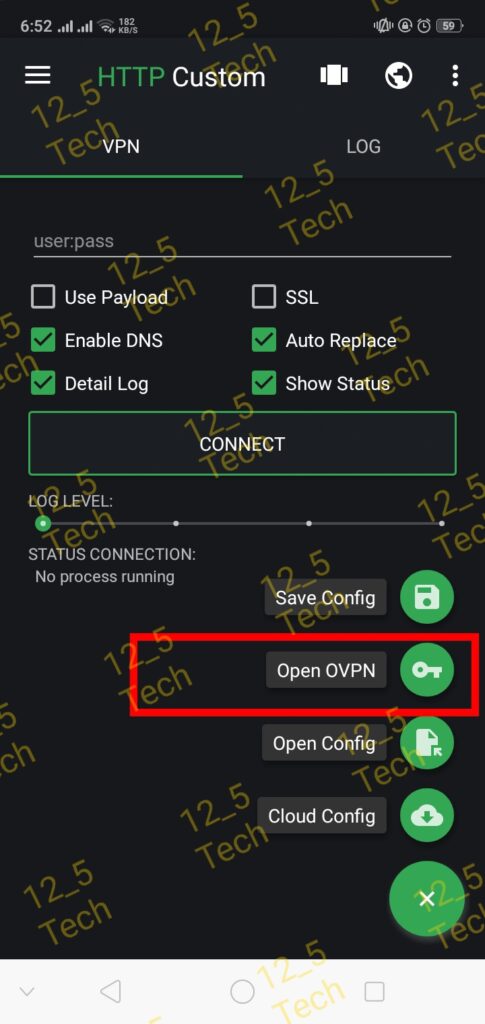
and then click on “OpenVPN” to import the configuration file you downloaded earlier.
Connect to the OpenVPN Server
- Select the OpenVPN configuration file you want to use, and then tap on the “Connect” button to start the VPN connection.
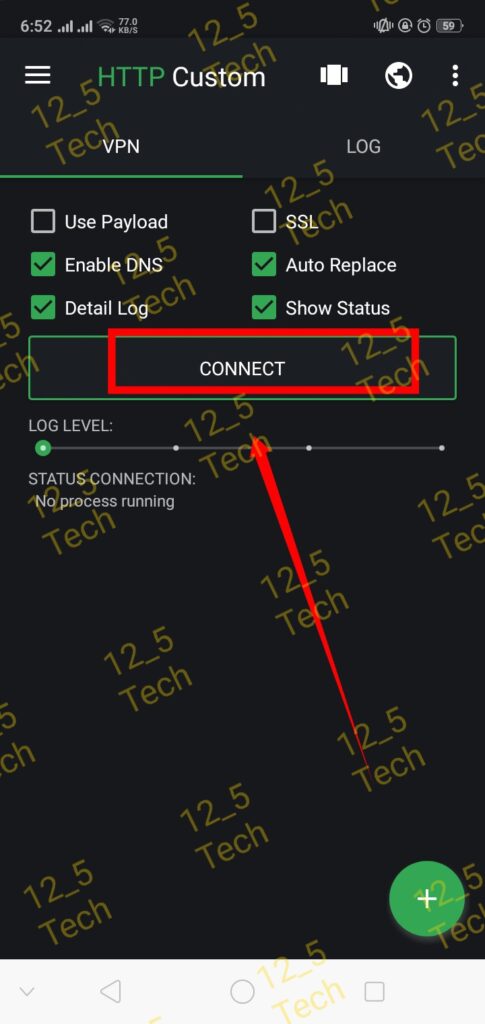
- Your device will now be connected to the OpenVPN server powered by HTTP Custom VPN.
Explore Additional Customization Options (Optional)
Utilizing SNI or Payload in OpenVPN Configurations
Configuring your OpenVPN connections to incorporate Server Name Indication (SNI) or Payload can enhance your browsing experience and tailor your VPN setup to specific needs. Here’s a step-by-step guide to implementing these features:
OpenVPN Payload Configuration:
- Accessing OpenVPN Configurations: Navigate to the server icon and click on it. This will lead you to the OpenVPN configuration settings.
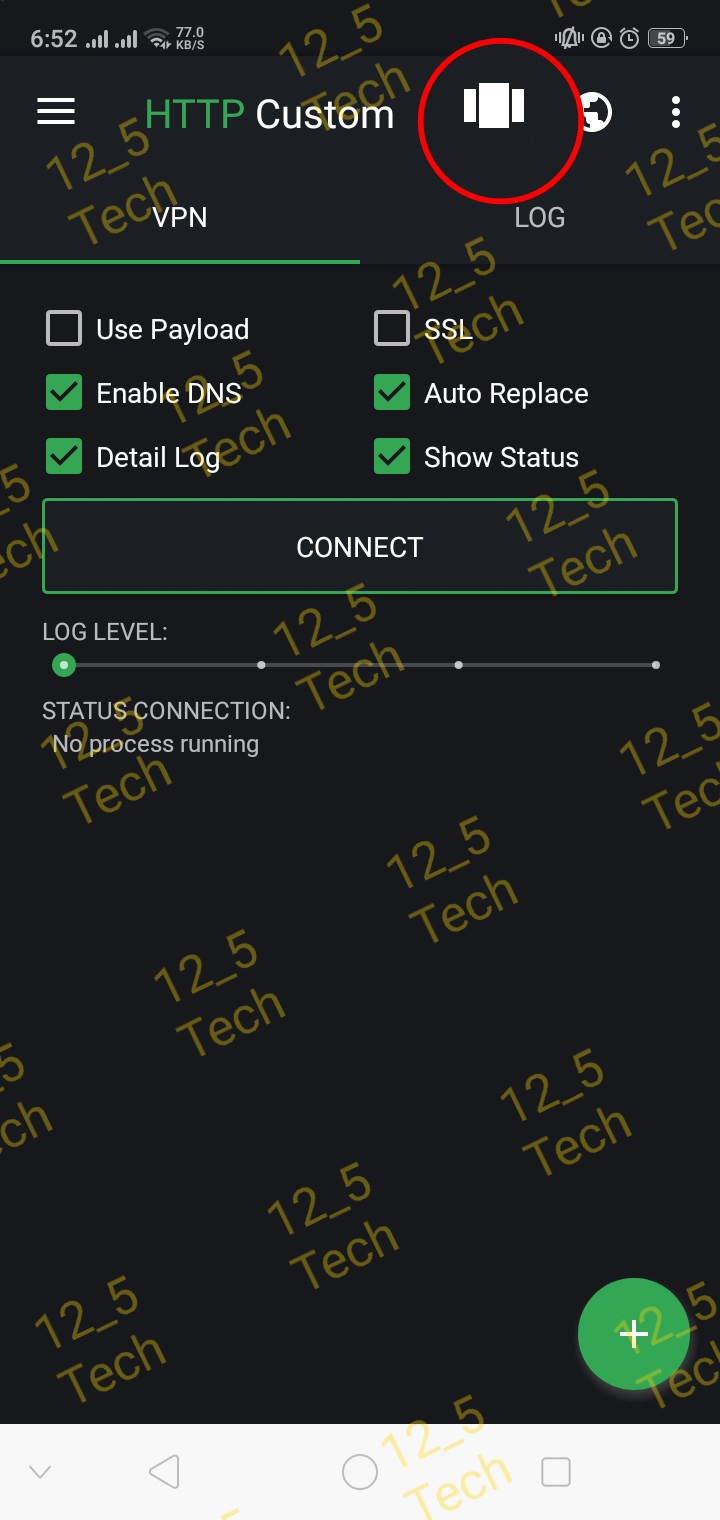
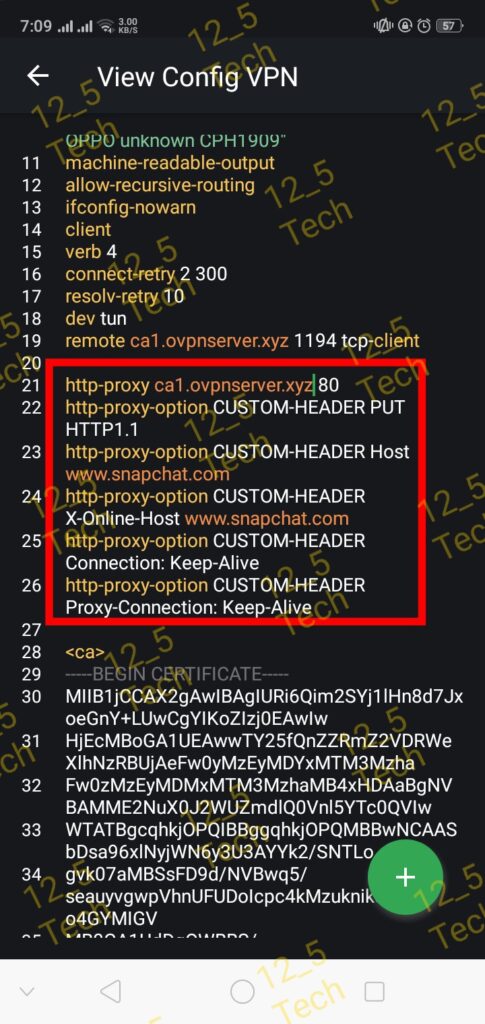
- Editing Configuration: Within the configuration settings, locate the option to edit the OpenVPN configuration. Here, you can add the desired payload.
http-proxy 11.12.13.14 80
http-proxy-option CUSTOM-HEADER PUT HTTP1.1
http-proxy-option CUSTOM-HEADER Host www.snapchat.com
http-proxy-option CUSTOM-HEADER X-Online-Host www.snapchat.com
http-proxy-option CUSTOM-HEADER Connection: Keep-Alive
http-proxy-option CUSTOM-HEADER Proxy-Connection: Keep-Alive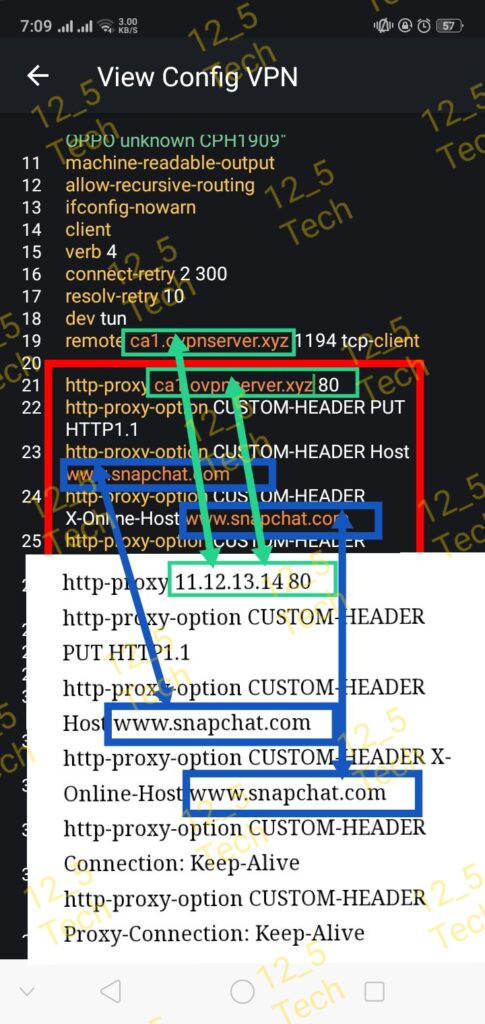
- Adding Payload: Insert the provided payload into the configuration. Ensure to replace the placeholder values, such as ‘demo proxy 11.12.13.14’ and ‘port 80’, with the appropriate server details and target domain, such as ‘www.snapchat.com’, according to your requirements.
HTTP Custom VPN Payload and SNI Configuration:
For users interested in employing HTTP custom payloads or SNI, the configuration process can be executed as follows:
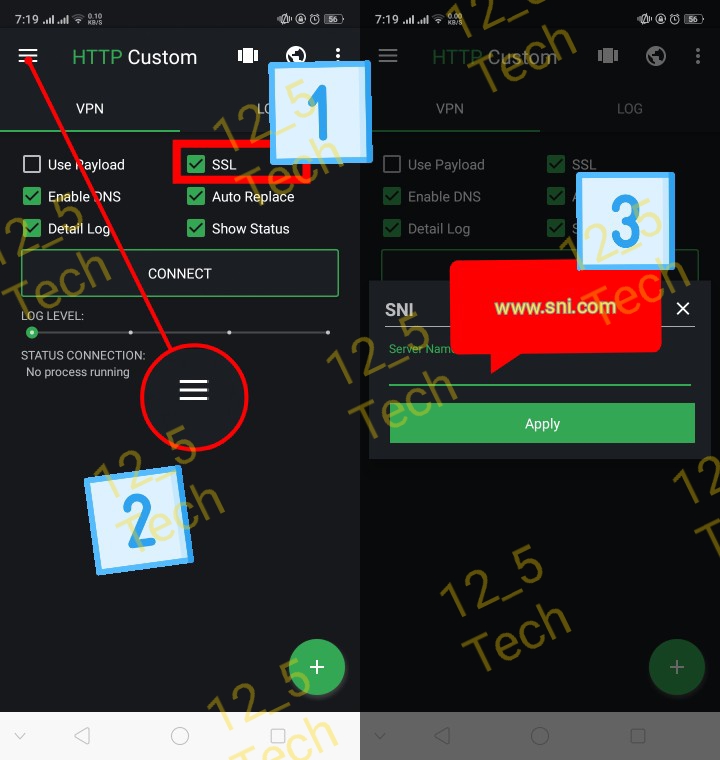
- Selecting Payload or SNI: Depending on your preference, you can opt to utilize either HTTP custom payload or SNI. However, it’s important to note that only one option can be utilized at a time.
- Configuring SNI: If you choose to employ SNI, begin by selecting the SNI box. Subsequently, click on the hamburger icon, followed by the ‘SNI’ button. This action will prompt a new dialogue box where you can enter the desired SNI host.
- Configuring Payload: Alternatively, if you opt for a payload configuration, start by checking the payload box. Then, click on the hamburger icon situated on the side panel. Select ‘Payload Settings’, which will prompt a new dialogue box. Here, input the payload along with a working host.
GET / HTTP/1.1[crlf]Host: www.whatsapp.com[crlf]Upgrade: websocket[crlf][crlf]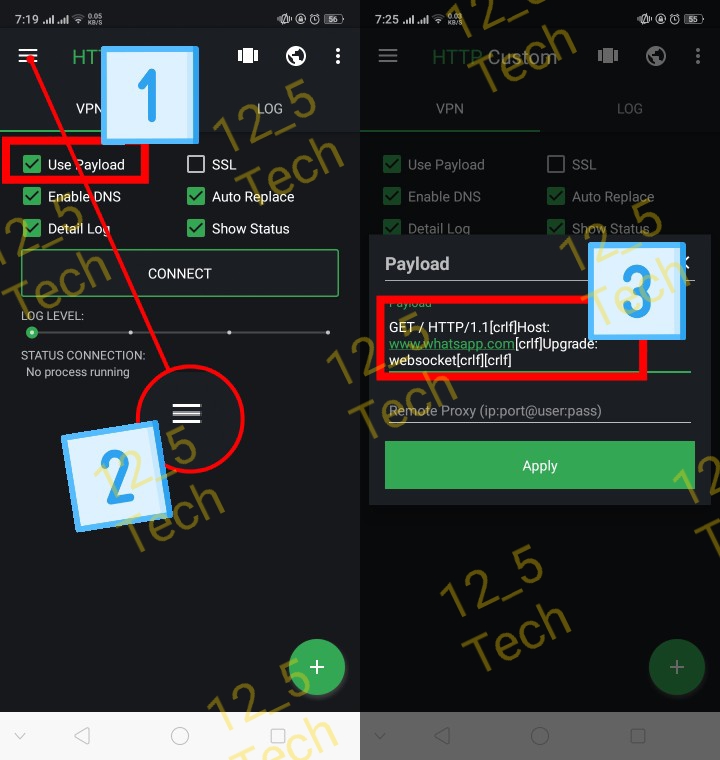
Conclusion: Embrace the Power of HTTP Custom OpenVPN
By following this comprehensive, step-by-step guide, you’ve successfully set up an OpenVPN server using the powerful HTTP Custom VPN app. With the robust encryption and security features of OpenVPN at your fingertips, you can now enjoy enhanced online privacy and protection for your sensitive data. Remember to explore the additional customization options to tailor your VPN experience to your specific needs. Embrace the power of HTTP Custom OpenVPN and take control of your digital security today!
Stay Connected for the Latest Updates and Exciting Content!
- 12_5 TECH Whatsapp channel
- Rumble Channel (Watch my previously deleted YouTube video here)
- Telegram Group
- Telegram Channel
- Follow me on Twitter
- Join me on WhatsApp
- Join my Vibrant Discord Server
- Like and Follow my Facebook Page
- YouTube 13 Tech
- YouTube 12_5 Tech
- YouTube 13_3 Tech
- YouTube 3021 Tech
Don’t Miss Out! Follow me on these platforms to stay informed and entertained with the latest tech updates and engaging content! 🚀🔥✨