Table of Contents
- Step 1: Open Your Browser
- Step 2: Navigate to the UDPCustom Website
- Step 3: Access the Premium UDP Server Menu
- Step 4: Choose a 30-Day UDP Server
- Step 5: Create an Account
- Step 6: Save Your Server Details
Introduction
Welcome to our comprehensive guide on obtaining a 30-day UDP server for your VPN. This tutorial is designed to help you navigate the process smoothly, ensuring fast and secure browsing. Whether you’re new to VPNs or an experienced user, this step-by-step guide will provide all the information you need.
Step-by-Step Guide
Step 1: Open Your Browser
First, open your preferred web browser. You can use Chrome, Firefox, Safari, or any other browser of your choice.
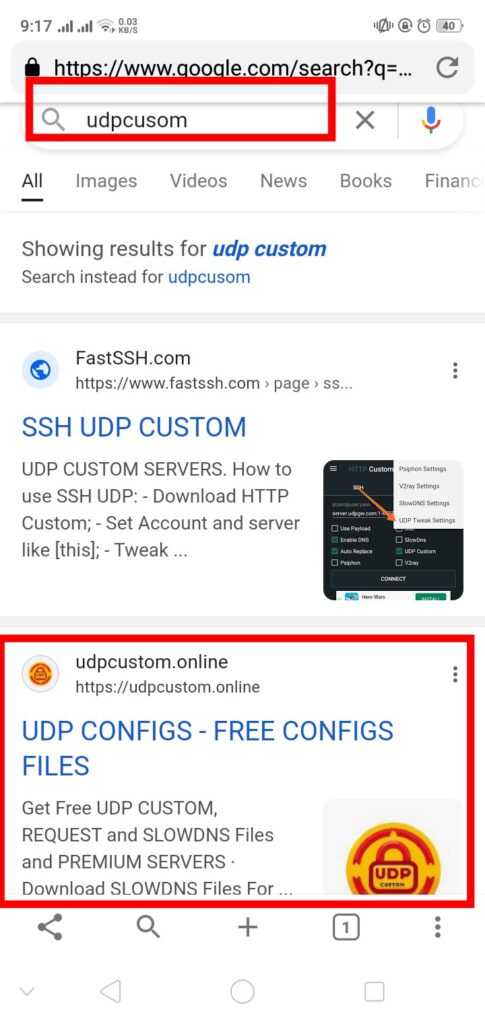
Step 2: Navigate to the UDPCustom Website
In the browser’s address bar, type in udpcustom.com and press Enter. This will take you to the homepage of the UDPCustom website.
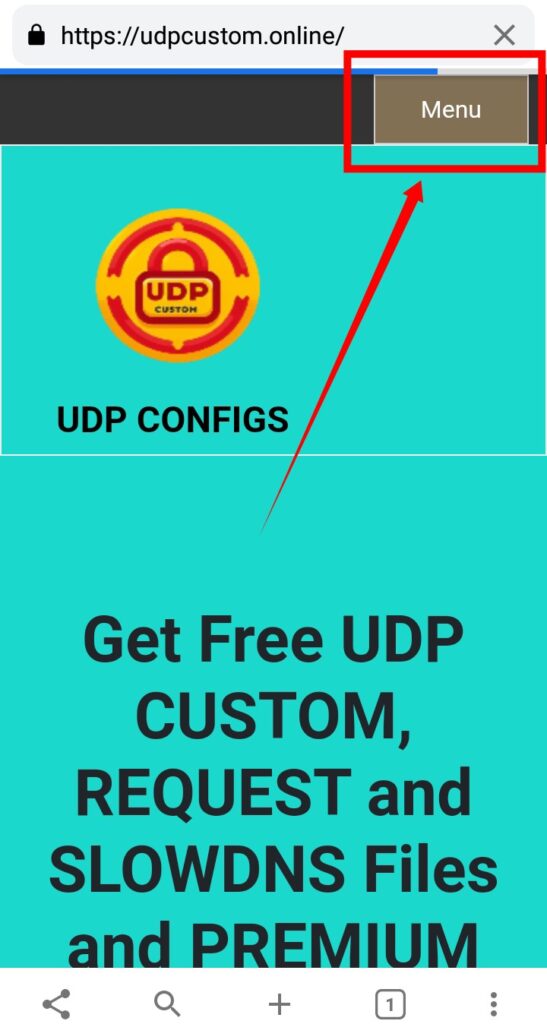
Step 3: Access the Premium UDP Server Menu
Once on the homepage, look towards the top right corner of the screen. You’ll see a hamburger icon, which looks like three horizontal lines. Click on this icon to expand the menu options.
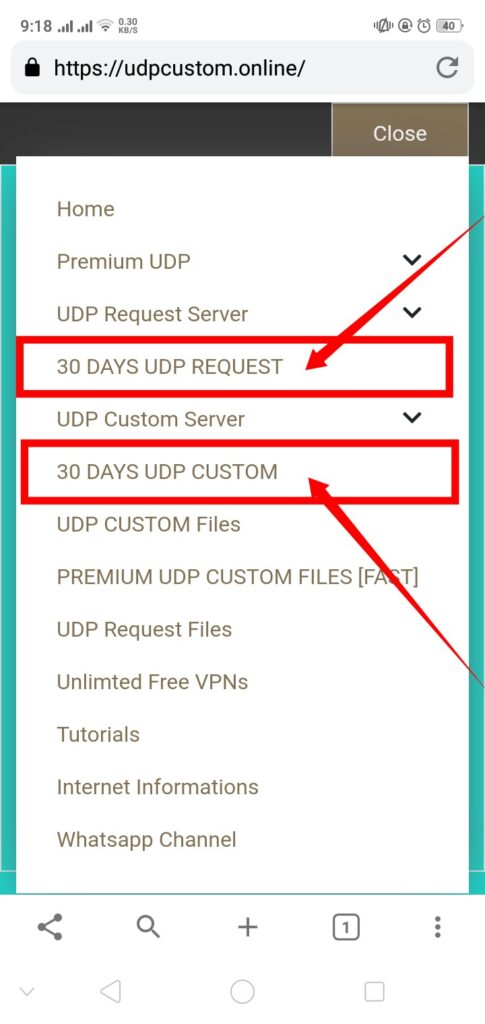
Step 4: Choose a 30-Day UDP Server
From the expanded menu options, find and click on PREMIUM UDP SERVER. This will open additional submenus. Here, you will see options for UDP Request Servers and UDP Custom Servers. Select either 30 Days UDP Request or 30 Days UDP Custom Server. For this guide, we’ll choose 30 Days UDP Custom Server.
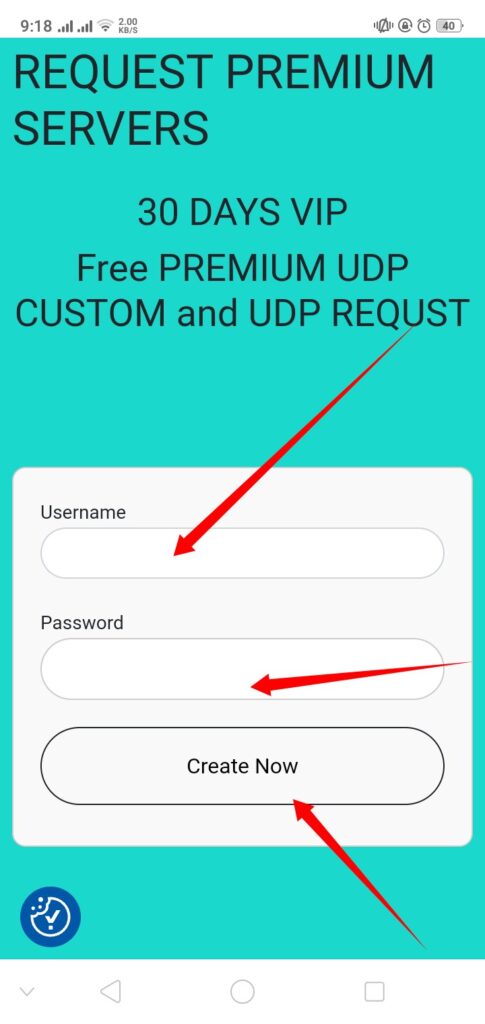
Step 5: Create an Account
You will be directed to a page with an account creation form. Enter your desired username and password. After filling in these details, click on the Create Account button. In a few seconds, your 30-day UDP server will be created.
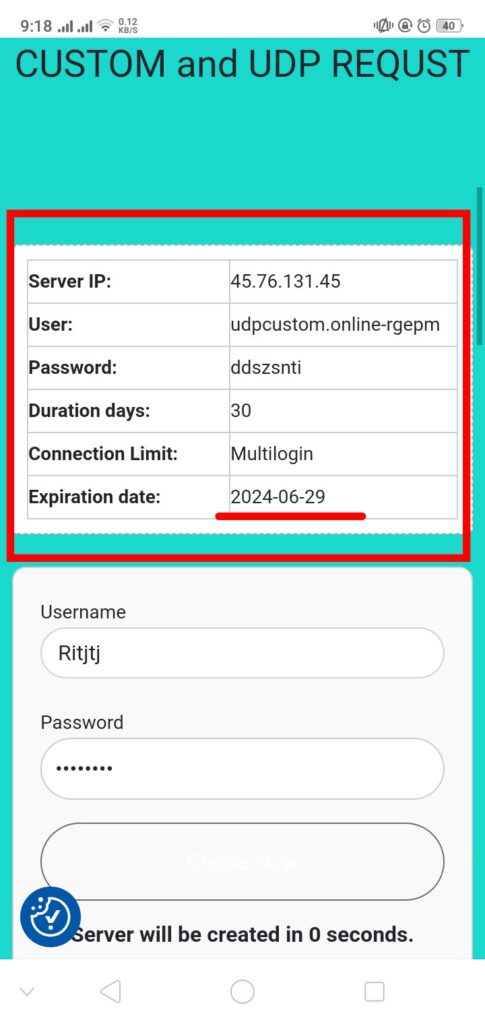
Step 6: Save Your Server Details
Your server details will be displayed on the screen. Make sure to copy these details and save them in a notepad or a secure place for future use.
Using UDP Servers with VPNs
If you are new to using UDP Custom and UDP Request servers with HTTP Custom VPN or SOCKSIP Tunnel VPN, check out our tutorial videos linked below. These videos will guide you through the setup process step-by-step, ensuring you can maximize the benefits of your new 30-day UDP server.
How to use udp custom on http custom vpn
How to use udp request server on Socksip tunnel
Conclusion
And that’s it! You now have a 30-day UDP server for your VPN, which will enhance your browsing experience with speed and security. If you found this guide helpful, please share it with others who might benefit. Don’t forget to subscribe to our channel and follow our blog for more tutorials like this.
Thank you for reading, and we hope this guide helps you enhance your VPN experience!
FAQs
Q1: What is a UDP server and why do I need it for my VPN?
A UDP server provides a protocol used by VPNs for faster data transmission, making your browsing experience quicker and more efficient.
Q2: Is it safe to use a 30-day UDP server?
Yes, using a 30-day UDP server from a reputable provider like UDPCustom ensures your data remains secure while enjoying enhanced speed.
Q3: Can I use the UDP server with any VPN service?
Most modern VPN services support UDP servers. However, it’s always best to check the compatibility with your specific VPN provider.
Q4: What should I do if I encounter issues during the setup?
Refer to our detailed tutorial videos or contact the support team at UDPCustom for assistance.
Q5: Can I extend the usage of my UDP server beyond 30 days?
Typically, you can renew or request a new server after the initial 30-day period. Check with UDPCustom for renewal options.
