Experiencing slow connections with free UDP custom servers for your HTTP Custom VPN can be frustrating. This comprehensive guide will show you how to set up a fast and secure UDP premium server, ensuring a reliable internet connection. By following these detailed steps, you can significantly improve your browsing experience.
Table of Contents
- Introduction
- Step 1: Launch Your Browser
- Step 2: Search for “UDP Custom”
- Step 3: Visit a UDP Custom Website
- Step 4: Access Premium UDP Options (For Mobile Users)
- Step 5: Select “Premium UDP”
- Step 6: Choose “UDP Custom Server”
- Step 7: Choose Your Server Location
- Step 8: Create Your Server Account
- Step 9: Copy Server Details
- Step 10: Download HTTP Custom VPN
- Step 11: Configure UDP Custom Settings
- Step 12: Enter UDP Custom Server Details
- Step 13: Connect Your VPN
- Conclusion
- FAQs
Introduction
Experiencing slow connections with free UDP custom servers for your HTTP Custom VPN can be frustrating. In this comprehensive guide, we’ll show you how to set up a fast and secure UDP premium server, ensuring a reliable internet connection. Follow these detailed steps to improve your browsing experience.
Step 1: Launch Your Browser
Begin by opening any web browser on your device. This could be Chrome, Firefox, Safari, or any other browser you prefer to use.
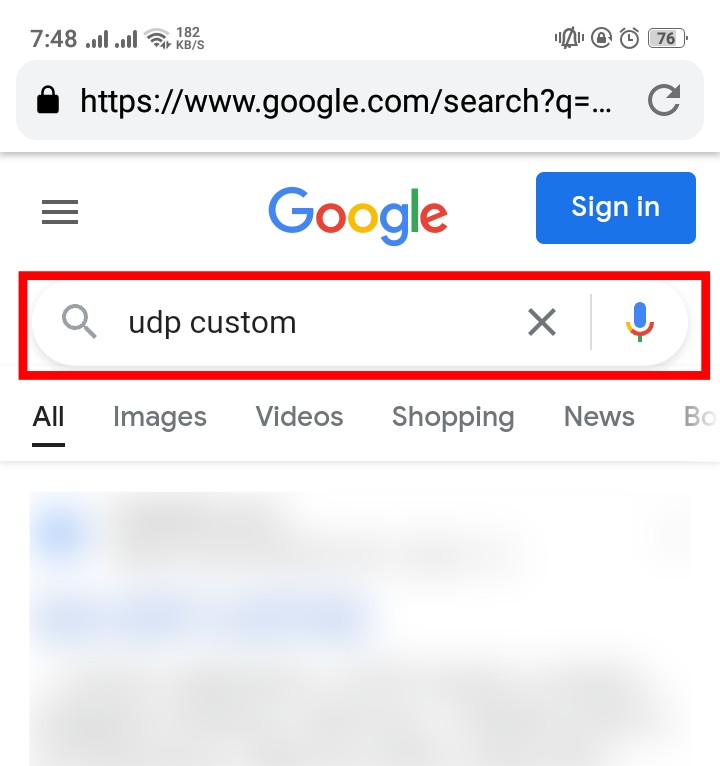
Step 2: Search for “UDP Custom”
In the browser’s search bar, type “UDP custom” and press enter. This will bring up a list of websites offering UDP custom services.
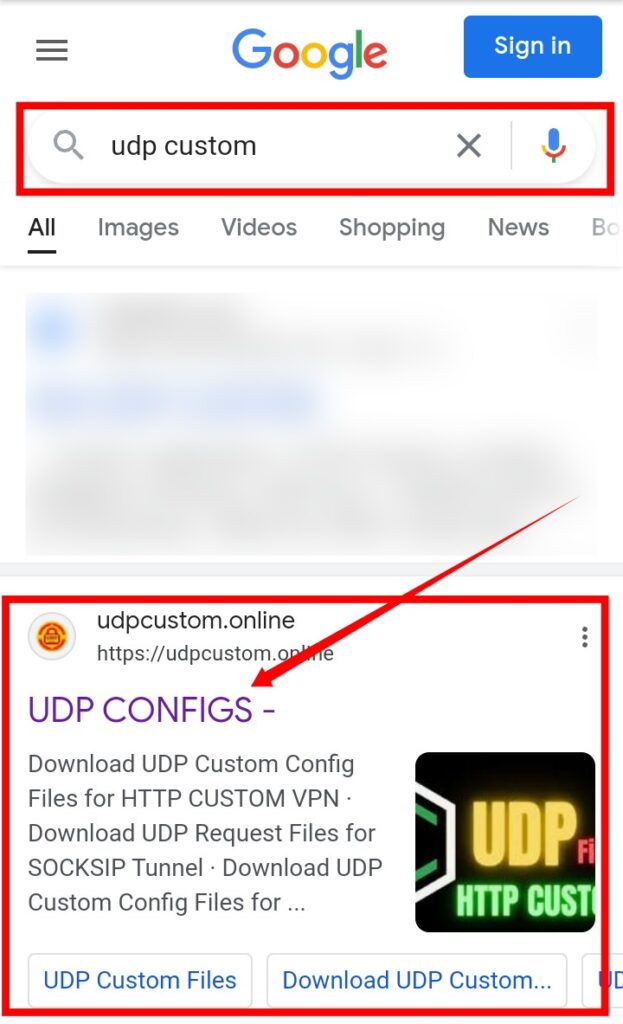
Step 3: Visit a UDP Custom Website
From the search results, click on one of the links to visit a UDP custom website. This action will take you to the homepage of the website where you can explore their services.
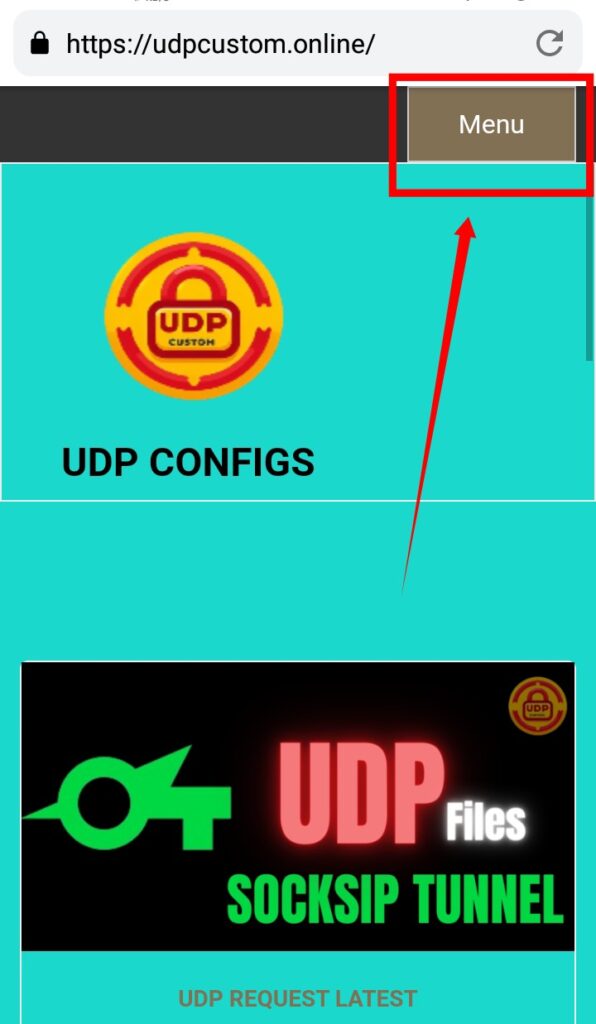
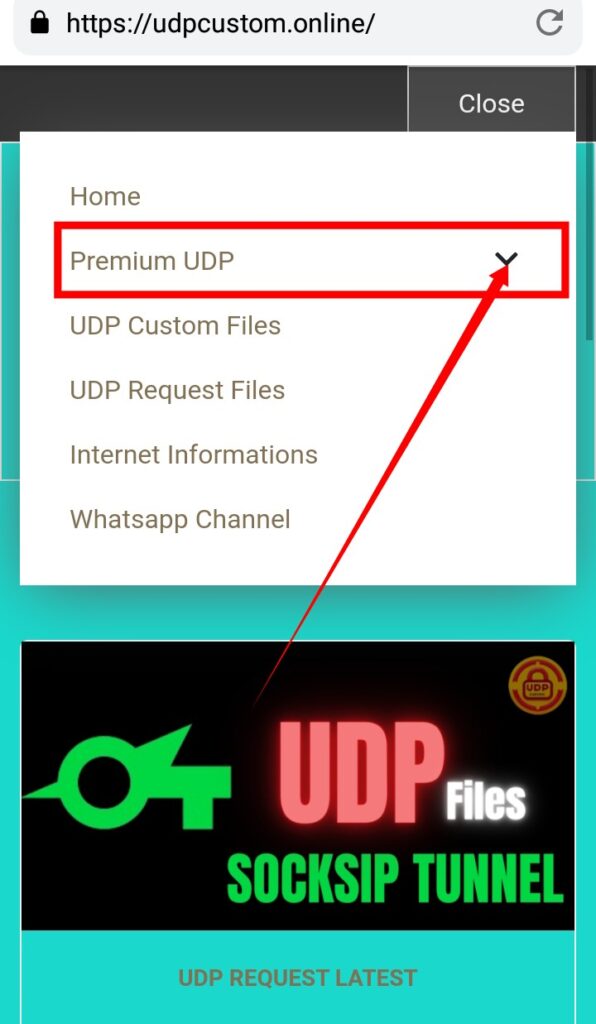
Step 4: Access Premium UDP Options (For Mobile Users)
If you are using a mobile phone, you will need to navigate through the website’s menu. Look for the hamburger icon (three horizontal lines) usually located in the top corner of the screen. Click on this icon to expand the menu options.
Step 5: Select “Premium UDP”
In the expanded menu, find and click on the “Premium UDP” option. This selection will lead you to a submenu with further choices.
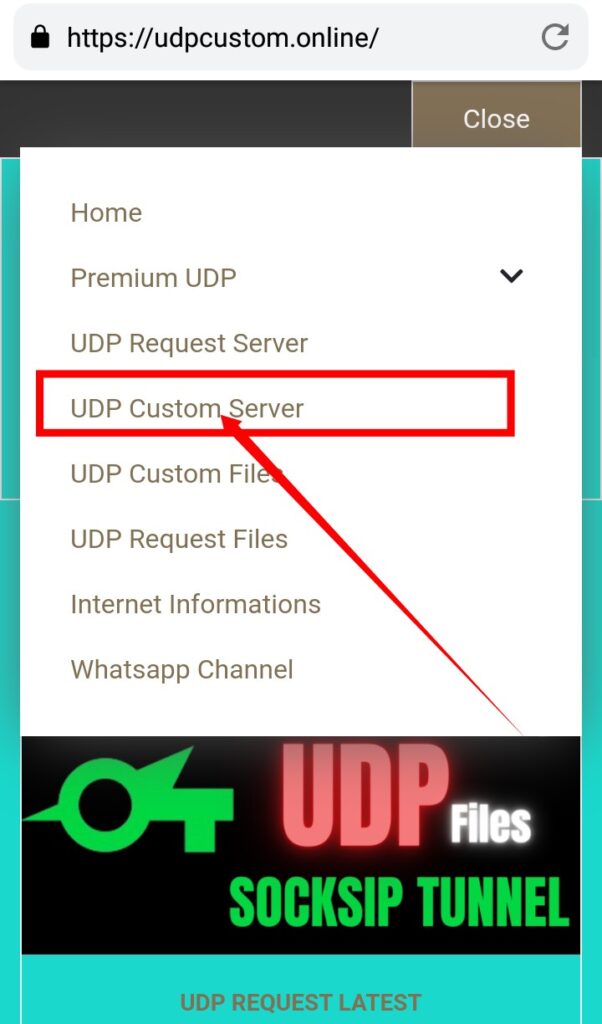
Step 6: Choose “UDP Custom Server”
Within the submenu, locate and select “UDP Custom Server”. This will take you to the page where you can configure your server settings.
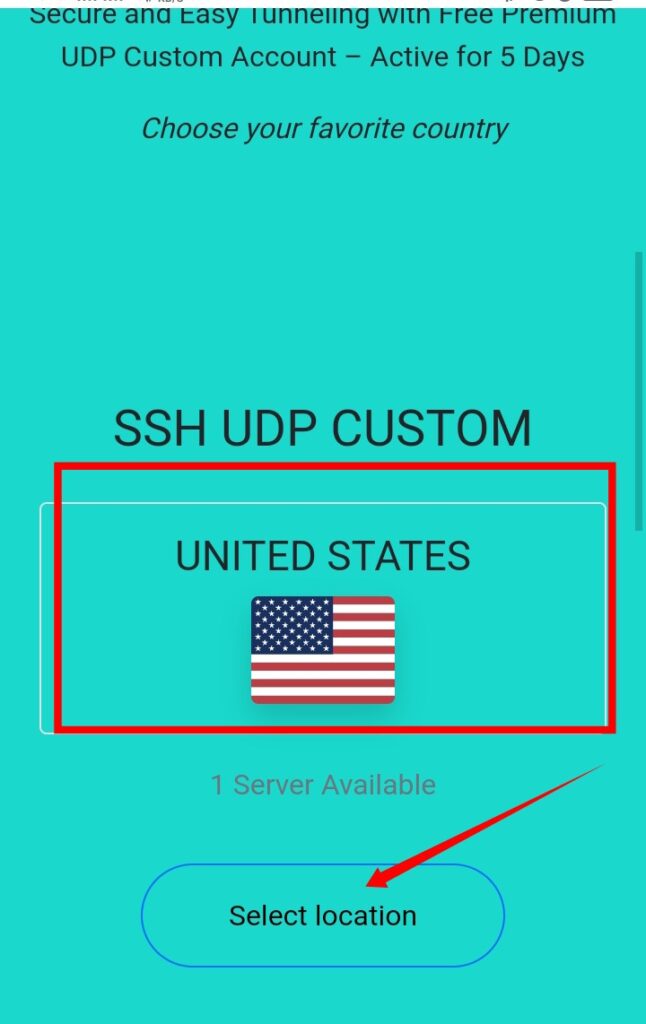
Step 7: Choose Your Server Location
On the next page, you need to choose a location for your server. Click on the “Select Location” button. A list of available locations will appear. Choose the location that best suits your needs and confirm your selection.
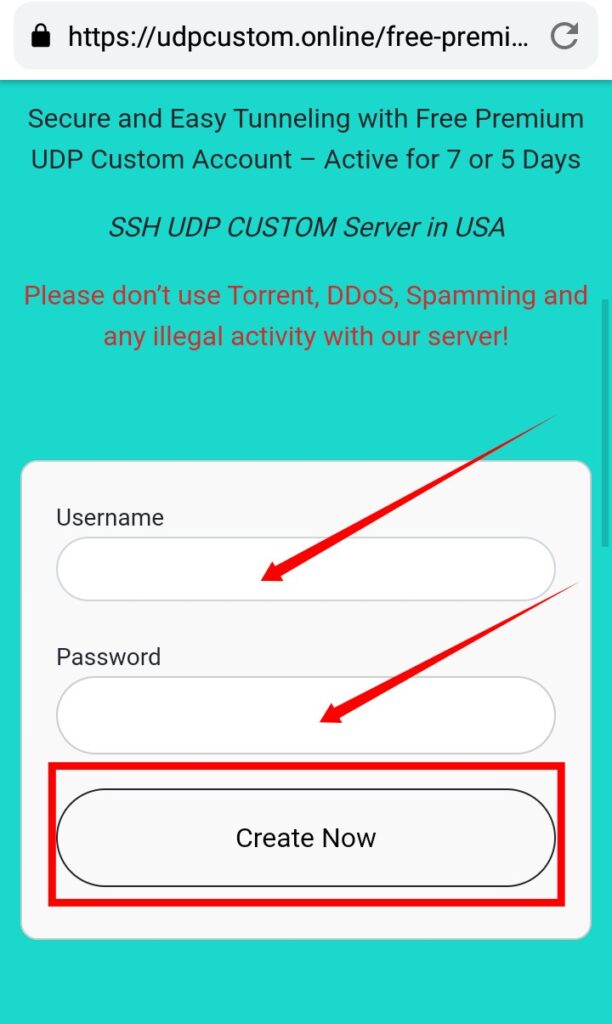
Step 8: Create Your Server Account
After selecting a location, you will see an account creation form. Enter a username and password of your choice. Make sure to remember these credentials as you will need them later. Once you have filled out the form, click on the “Create” button to set up your server.
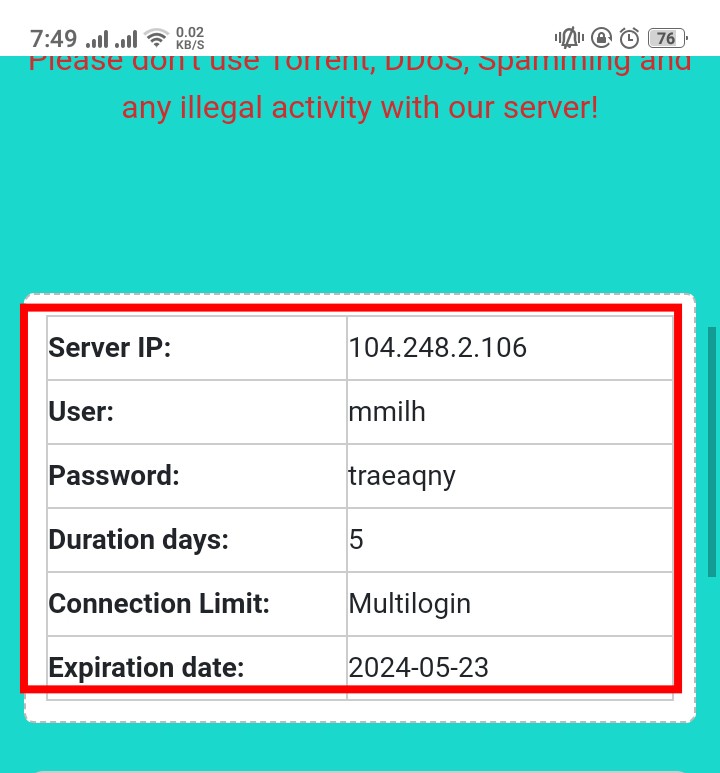
Step 9: Copy Server Details
Wait for a few seconds until your server is created. Once it’s ready, you will see the server details displayed on the screen. Copy these details carefully as you will need them for the next steps.
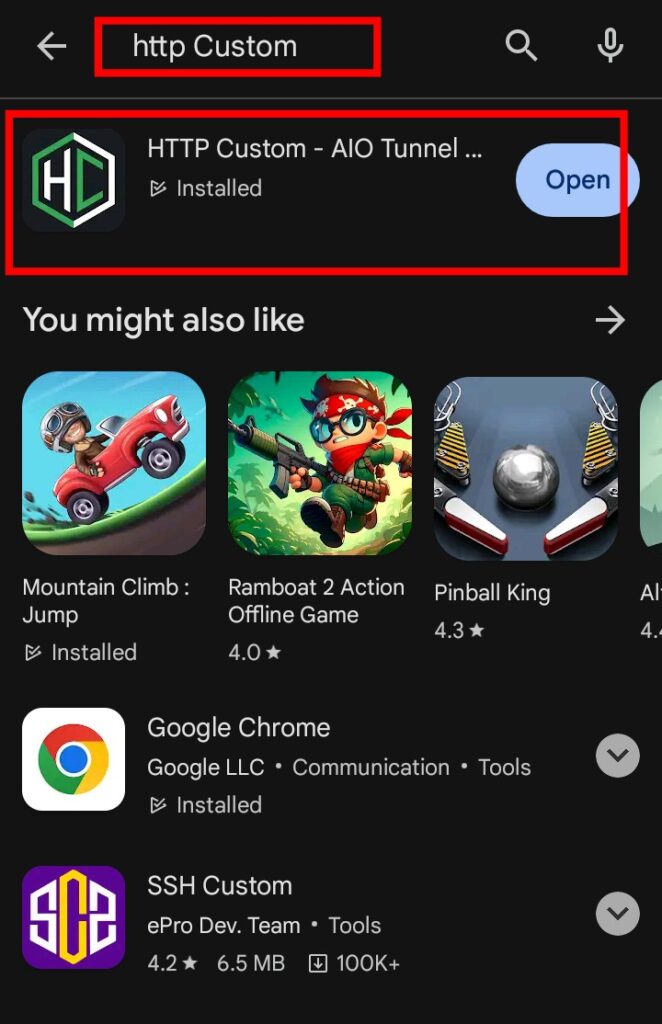
Step 10: Download HTTP Custom VPN
Now, open the Play Store on your mobile device and search for “HTTP Custom VPN“. Download and install the app. Once the installation is complete, launch the app to access the home screen.
Step 11: Configure UDP Custom Settings
On the home screen of the HTTP Custom VPN app, you will see several options. First, check the box labeled “UDP Custom” to enable the custom settings for UDP.

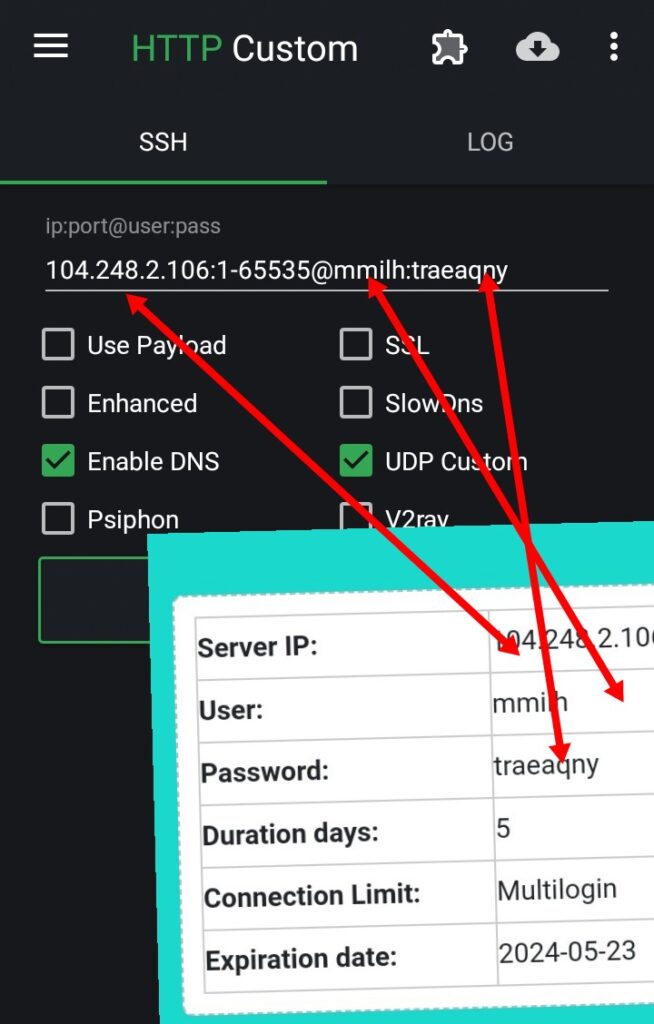
Step 12: Enter UDP Custom Server Details
In the app, locate the field labeled “SSH Server” or similar. Enter the UDP custom server details you copied earlier into this field. Make sure all the details are entered correctly to avoid any connection issues.
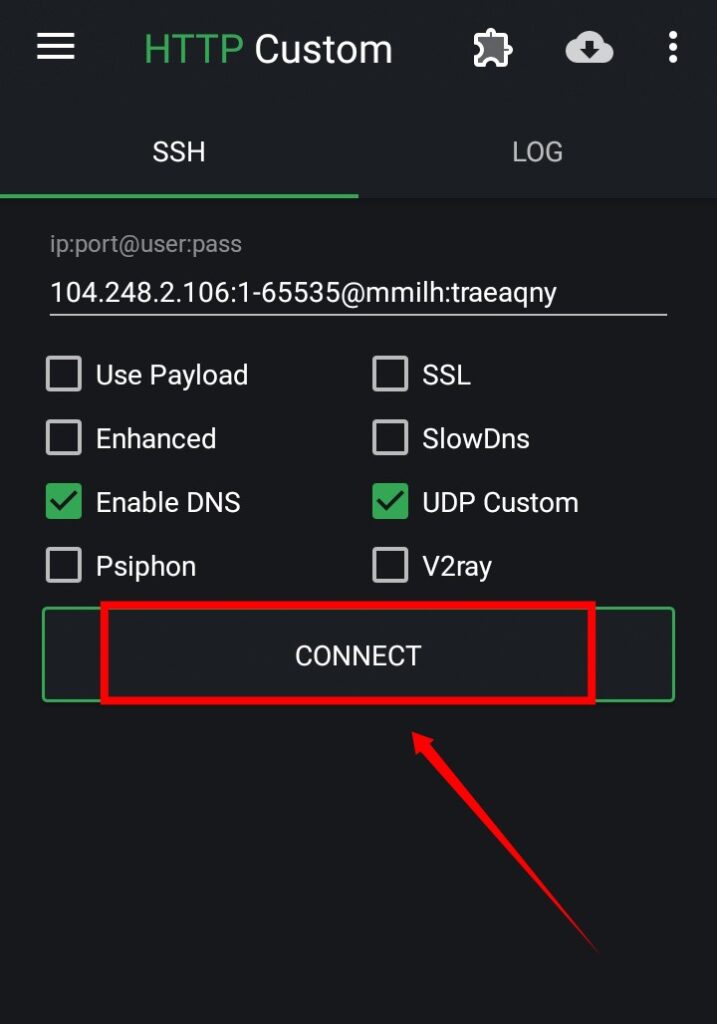
Step 13: Connect Your VPN
After entering the server details, review all the settings to ensure they are correct. Once everything is set, click on the “Connect” button to start the VPN. Your connection should now be secure and fast.
Conclusion
Congratulations! You have successfully set up a fast and secure UDP premium server for your HTTP Custom VPN. Enjoy a reliable internet connection with improved speed and security.Follow and Subscribe for more tech tutorials.
FAQs
Q: Can I use this method on any device?
A: Yes, you can follow these steps on any device that supports VPN configuration, including smartphones, tablets, and computers.
Q: Is there any cost associated with setting up a UDP premium server?
A: Some services may require a subscription fee for access to premium features, but there are also free options available. Choose the option that best fits your needs and budget.
Q: Will using a UDP premium server affect my internet speed?
A: In most cases, using a UDP premium server can improve your internet speed by providing a more reliable and efficient connection.
Q: Can I change the server location after setting up my UDP premium server?
A: Yes, most UDP premium server providers allow you to change the server location at any time to suit your needs. Simply follow the same steps to select a new location and update your server settings accordingly.
