In today’s digital age, protecting your online privacy and bypassing internet censorship is crucial. One effective way to achieve this is by using a VPN (Virtual Private Network). In this comprehensive guide, we will walk you through the steps to set up NetMod Syna VPN with SSH Slow DNS. This method will help you customize your network traffic, unblock restricted content, and maintain your anonymity online.
Table of Contents:
- What is NetMod Syna VPN?
- Benefits of Using NetMod Syna VPN
- Step-by-Step Guide to Setting Up NetMod Syna VPN with SSH Slow DNS
- Step 1: Install NetMod Syna VPN
- Step 2: Launch the App
- Step 3: Create an SSH DNSTT Server
- Step 4: Navigate to SSH OVPN
- Step 5: Select SSH SLOWDNS
- Step 6: Choose a Server Location
- Step 7: Create Your Server
- Step 8: Enter Server Details in NetMod Syna VPN
- Step 9: Configure SSH SLOWDNS
- Step 10: Start VPN Connection
- FAQs
- Conclusion
What is NetMod Syna VPN?
NetMod Syna VPN is a free, advanced VPN client that supports multiple VPN protocols such as SSH, V2RAY, and Socks. It is designed to help users customize their network traffic, bypass internet censorship, and stay anonymous while browsing the internet.

Benefits of Using NetMod Syna VPN
- Customizable Network Traffic: You can control how your data is routed through the internet.
- Bypass Internet Censorship: Access restricted websites and content.
- Enhanced Privacy: Protect your online activities from prying eyes.
- Multiple Protocols: Supports various VPN protocols for better flexibility.
Step-by-Step Guide to Setting Up NetMod Syna VPN with SSH Slow DNS
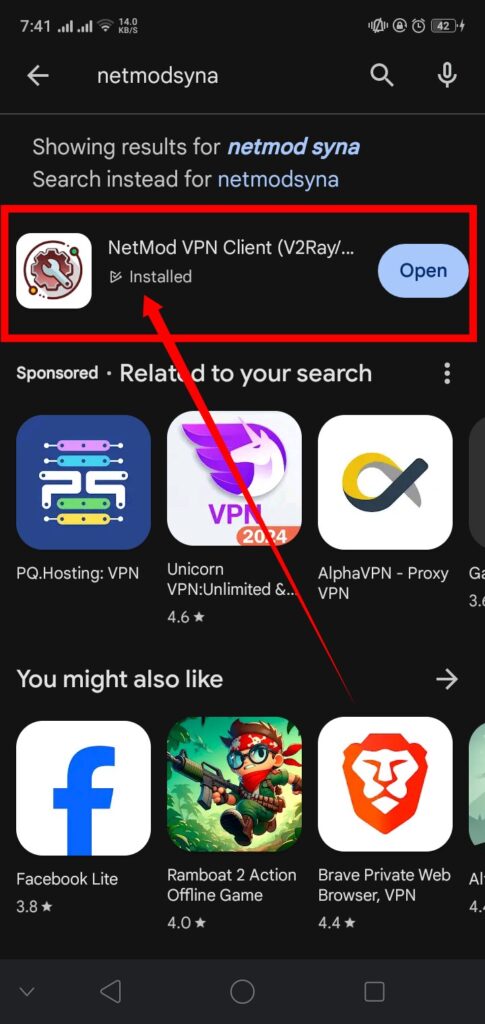
Step 1: Install NetMod Syna VPN
To begin, you need to install the NetMod Syna VPN app on your Android device. Open the Google Play Store and type “NetMod Syna VPN” in the search bar. Press enter, find the app in the search results, and click on it. Tap the “Install” button to download and install the app. Alternatively, you can download the app from the official NetMod Syna VPN website.
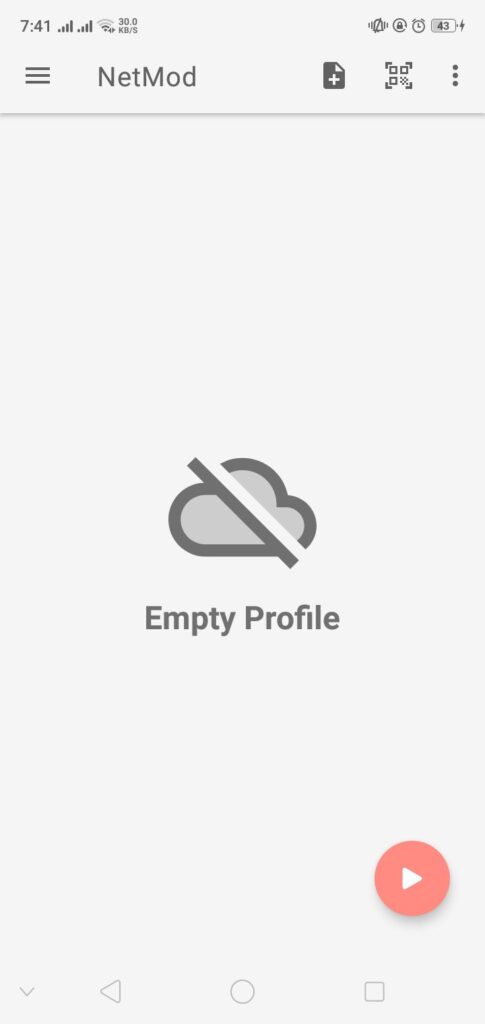
Step 2: Launch the App
Once the installation is complete, locate the NetMod Syna VPN app icon on your device and tap on it to launch the app. You will be greeted by the home screen of the app.
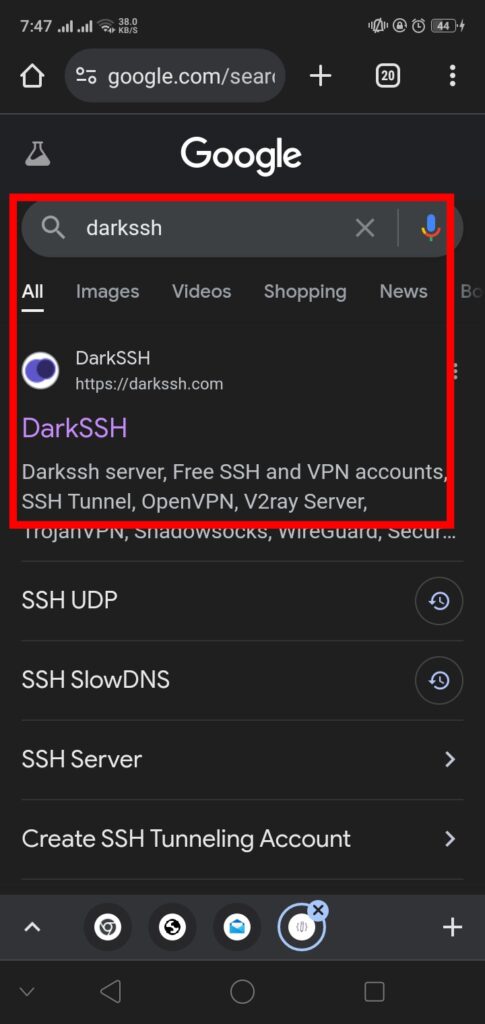
Step 3: Create an SSH DNSTT Server
Before proceeding with the VPN setup, you need an SSH DNSTT server. Open any web browser on your device and visit the Dark SSH website by typing “darkssh.com” in the address bar and pressing enter.
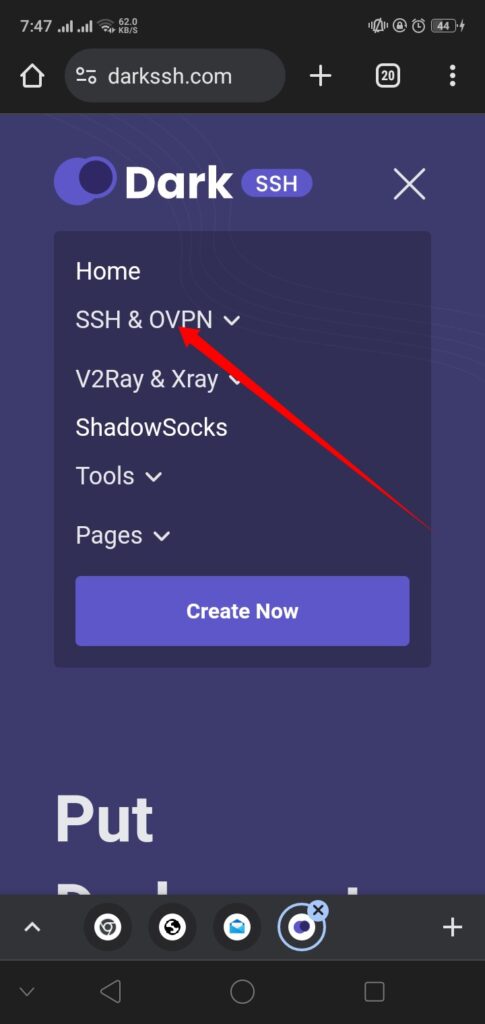
Step 4: Navigate to SSH OVPN
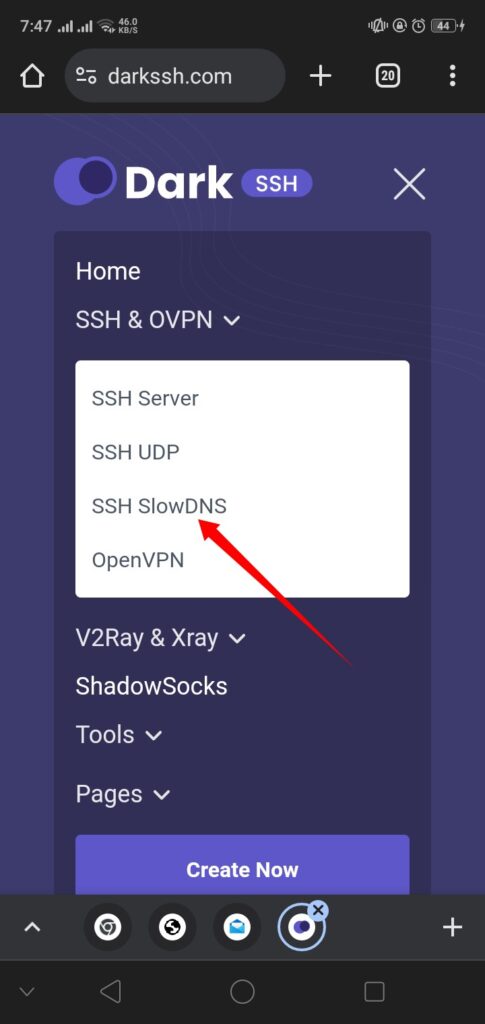
On the Dark SSH homepage, look for a three-line menu icon on the left side of the screen and click on it. A sidebar menu will appear. From the main menu, click on the “SSH OVPN” option.
Step 5: Select SSH SLOWDNS
After clicking on “SSH OVPN,” a submenu will appear. In this submenu, you will see a list of different SSH servers. Look for “SSH SLOWDNS” and click on it to start creating your server.
Step 6: Choose a Server Location
On the next page, you will see a list of different server locations. Scroll through the list and choose a location that suits you best. Once you have selected a location, click on the “Select Server” button. On the following page, you will see a list of available servers in the chosen location. Click on “Create” next to the server you want to use.

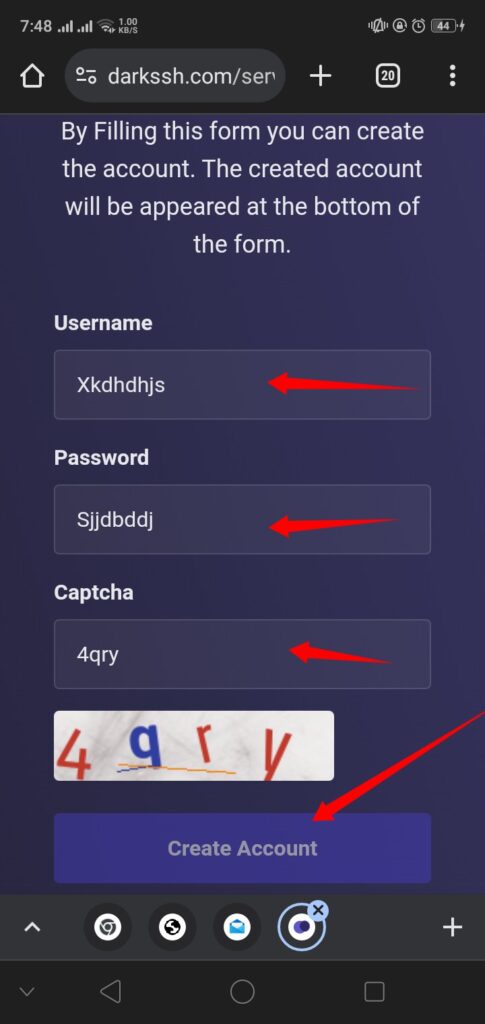
Step 7: Create Your Server
On the next page, you need to fill in some details to create your server. Enter a username and password of your choice. Complete the reCAPTCHA to verify that you are not a robot. Click on the “Create Now” button to create the server.
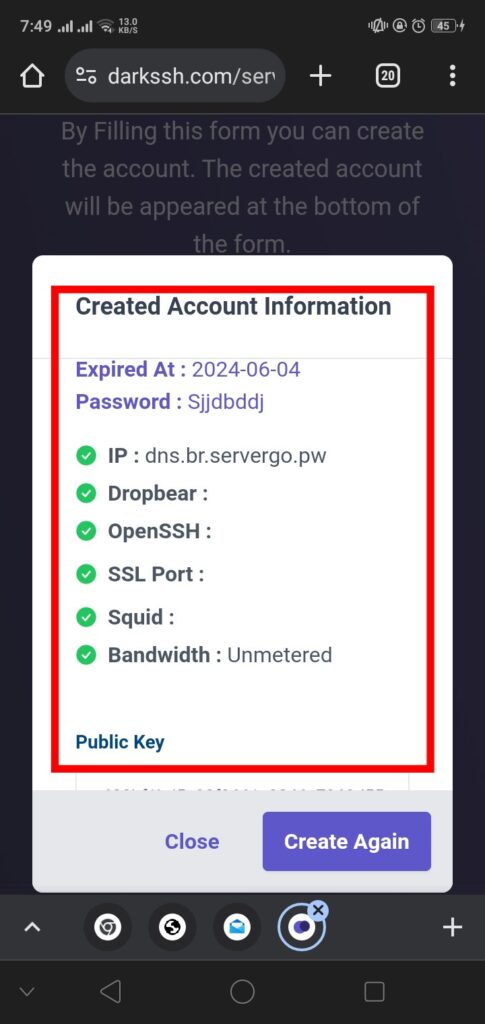
Wait a few seconds for the server to be created. Once the server is created, copy the server details (IP address, port, username, and password) as you will need them for the VPN setup.
Step 8: Enter Server Details in NetMod Syna VPN
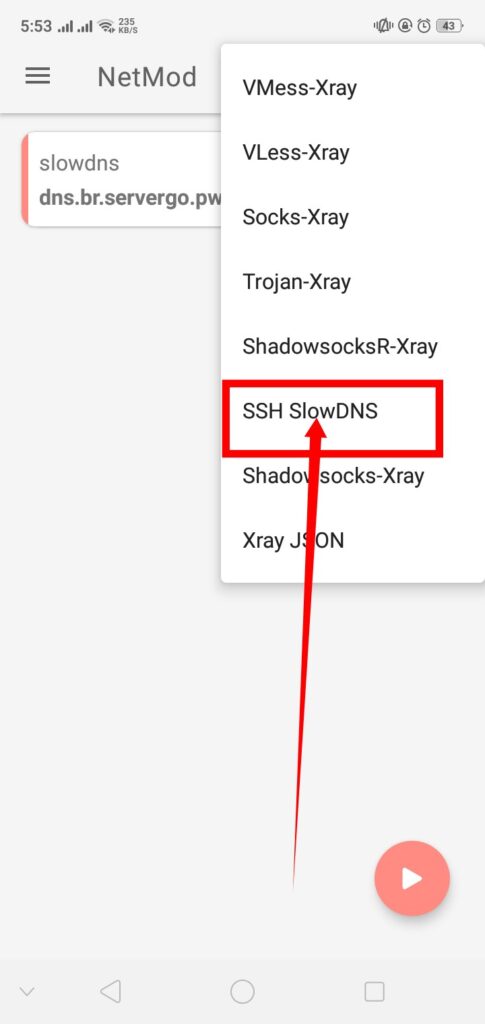
Return to the NetMod Syna VPN app. On the home screen of the app, look for a plus (+) icon at the top and click on it.
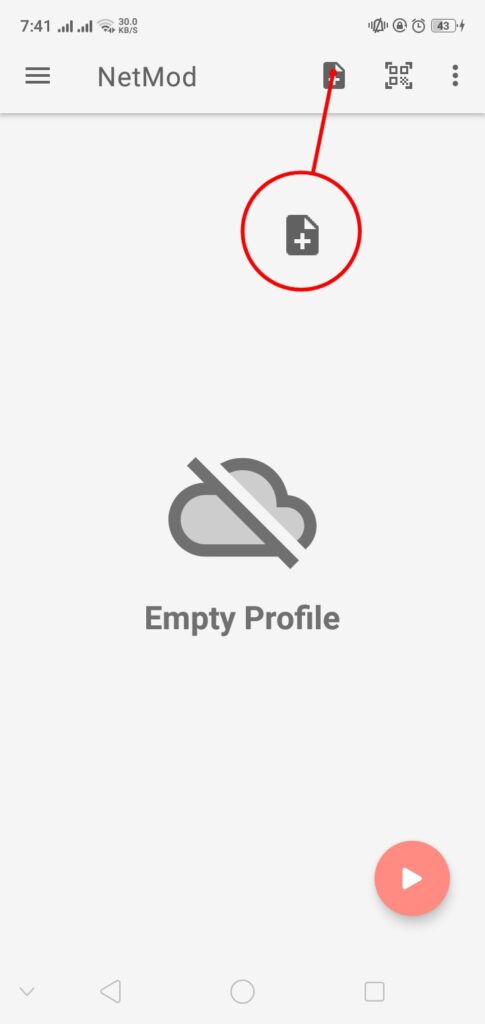
A list of configuration options will appear. Select “SSH SLOWDNS” from the list.
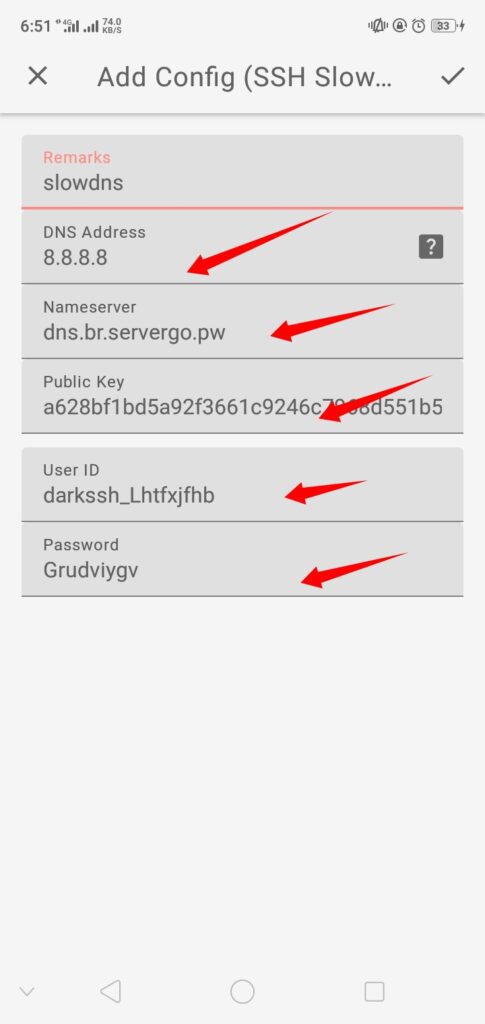
Step 9: Configure SSH SLOWDNS
You will now be on the configuration page for SSH SLOWDNS. Enter the server details you copied earlier: the server IP, port, username, and password. Fill in any other required fields. Once you have entered all the details, click on the check mark button to save the configuration.
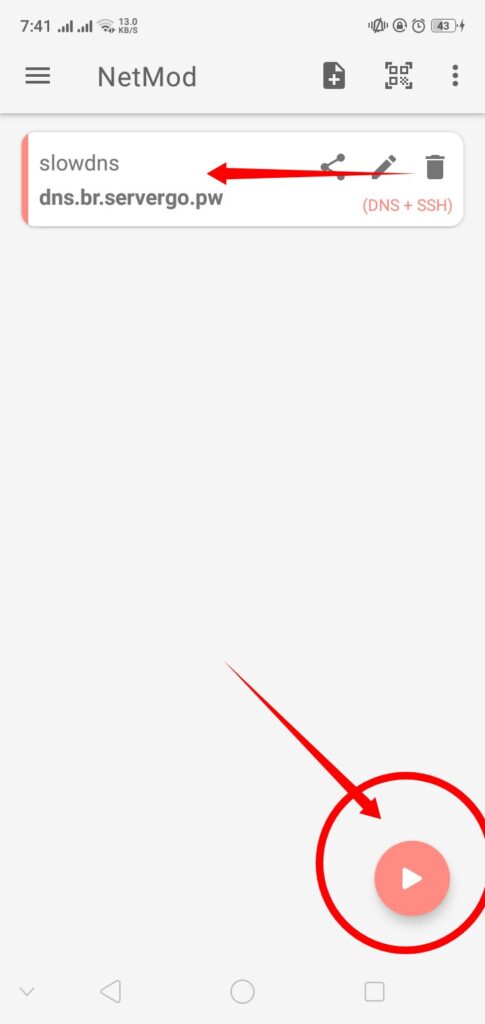
Step 10: Start VPN Connection
You will now see the configuration you just created on the home screen of NetMod Syna VPN. Tap on the configuration to select it. Click on the play button to start the VPN connection. Wait a few seconds for the connection to be established.
Conclusion
Congratulations! You have successfully set up NetMod Syna VPN with SSH Slow DNS. This setup will help you enjoy a secure and unrestricted internet connection. If you found this guide helpful, please like, share, and subscribe to our channel and Blog for more informative tutorials. Stay safe and browse securely!
FAQs
Q1: What is SSH Slow DNS?
A1: SSH Slow DNS is a method of tunneling SSH traffic through DNS queries, which can help bypass certain types of internet restrictions and firewalls.
Q2: Is NetMod Syna VPN free to use?
A2: Yes, NetMod Syna VPN is a free VPN client that offers various VPN protocols.
Q3: Can I use NetMod Syna VPN on devices other than Android?
A3: NetMod Syna VPN is primarily designed for Android devices. However, you can check their official website for any updates or versions available for other platforms.
Q4: Why do I need to create an SSH DNSTT server?
A4: Creating an SSH DNSTT server allows you to set up a secure connection through the NetMod Syna VPN app, enabling you to customize your network traffic and bypass internet censorship.
Q5: What should I do if I encounter issues while setting up the VPN?
A5: If you encounter any issues, ensure you have entered all details correctly. You can also check the NetMod Syna VPN documentation or support forums for assistance.
